
Ovation of the Seas – Cruise Blog – Day 8 – Back to Seattle
Last Updated on December 26, 2023
Our Alaskan cruise came to an end as the Ovation of the Seas docked in Seattle early on Friday morning. It was yet another beautiful day, making me realize how fortunate we were on this trip. The weather was mostly bright and sunny, between 60 and 70 degrees. Now that’s not always the case, and it could significantly impact your overall experience but we completely lucked out.
Debarkation and Seattle Overview
- Debarking Ovation of the Seas
- Getting to downtown Seattle
- Museum of Pop Culture (MoPOP)
- Space Needle
- Chihuly Glass and Garden
- Seattle Monorail
- Seattle Aquarium
- Beneath the Streets Tour of Seattle
- Seattle to Sea-Tac Airport
- Airport Chaos in Seattle
Debarking Ovation of the Seas
During the cruise, we received a form informing of our debarkation options and asking us which we preferred. Guests have two options to leave the ship, self-assist and regular departure.
Self-assist versus Regular Departure
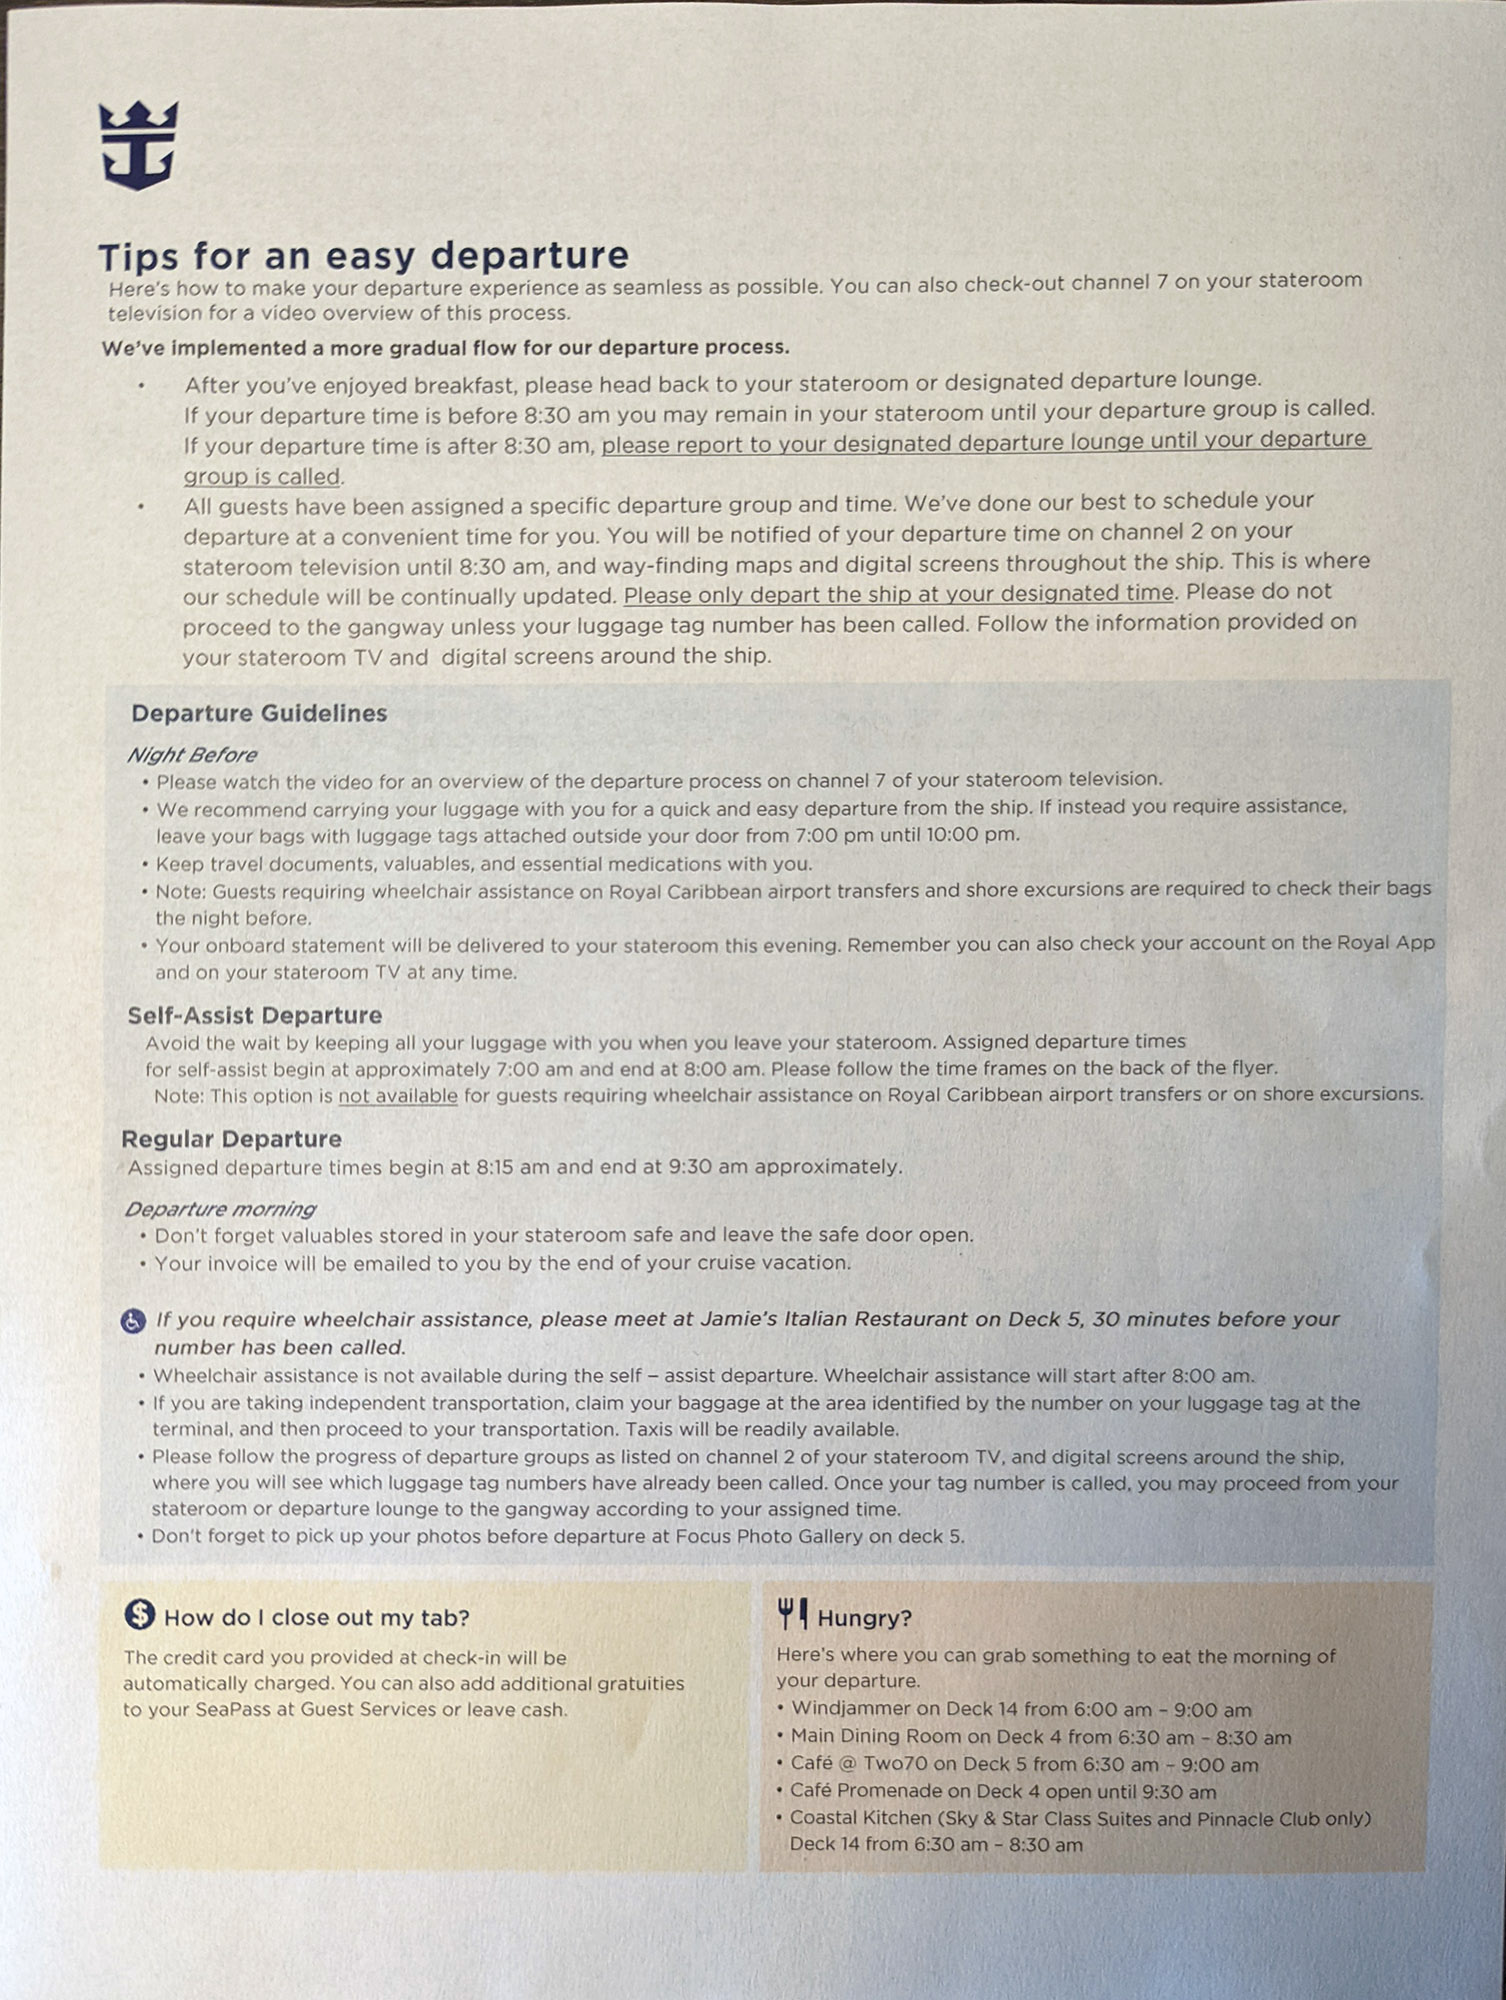
With self-assist, you’re saying you will carry all your bags off the ship with you, and you require no assistance from Royal Caribbean. That means you basically wake up and walk right off the ship (once the announcement is made). These guests have the first time slot, 7:00 – 8:00 AM in this case. Guests who choose this option usually want to be the first off the ship to catch an early flight home or because they hate waiting in line.
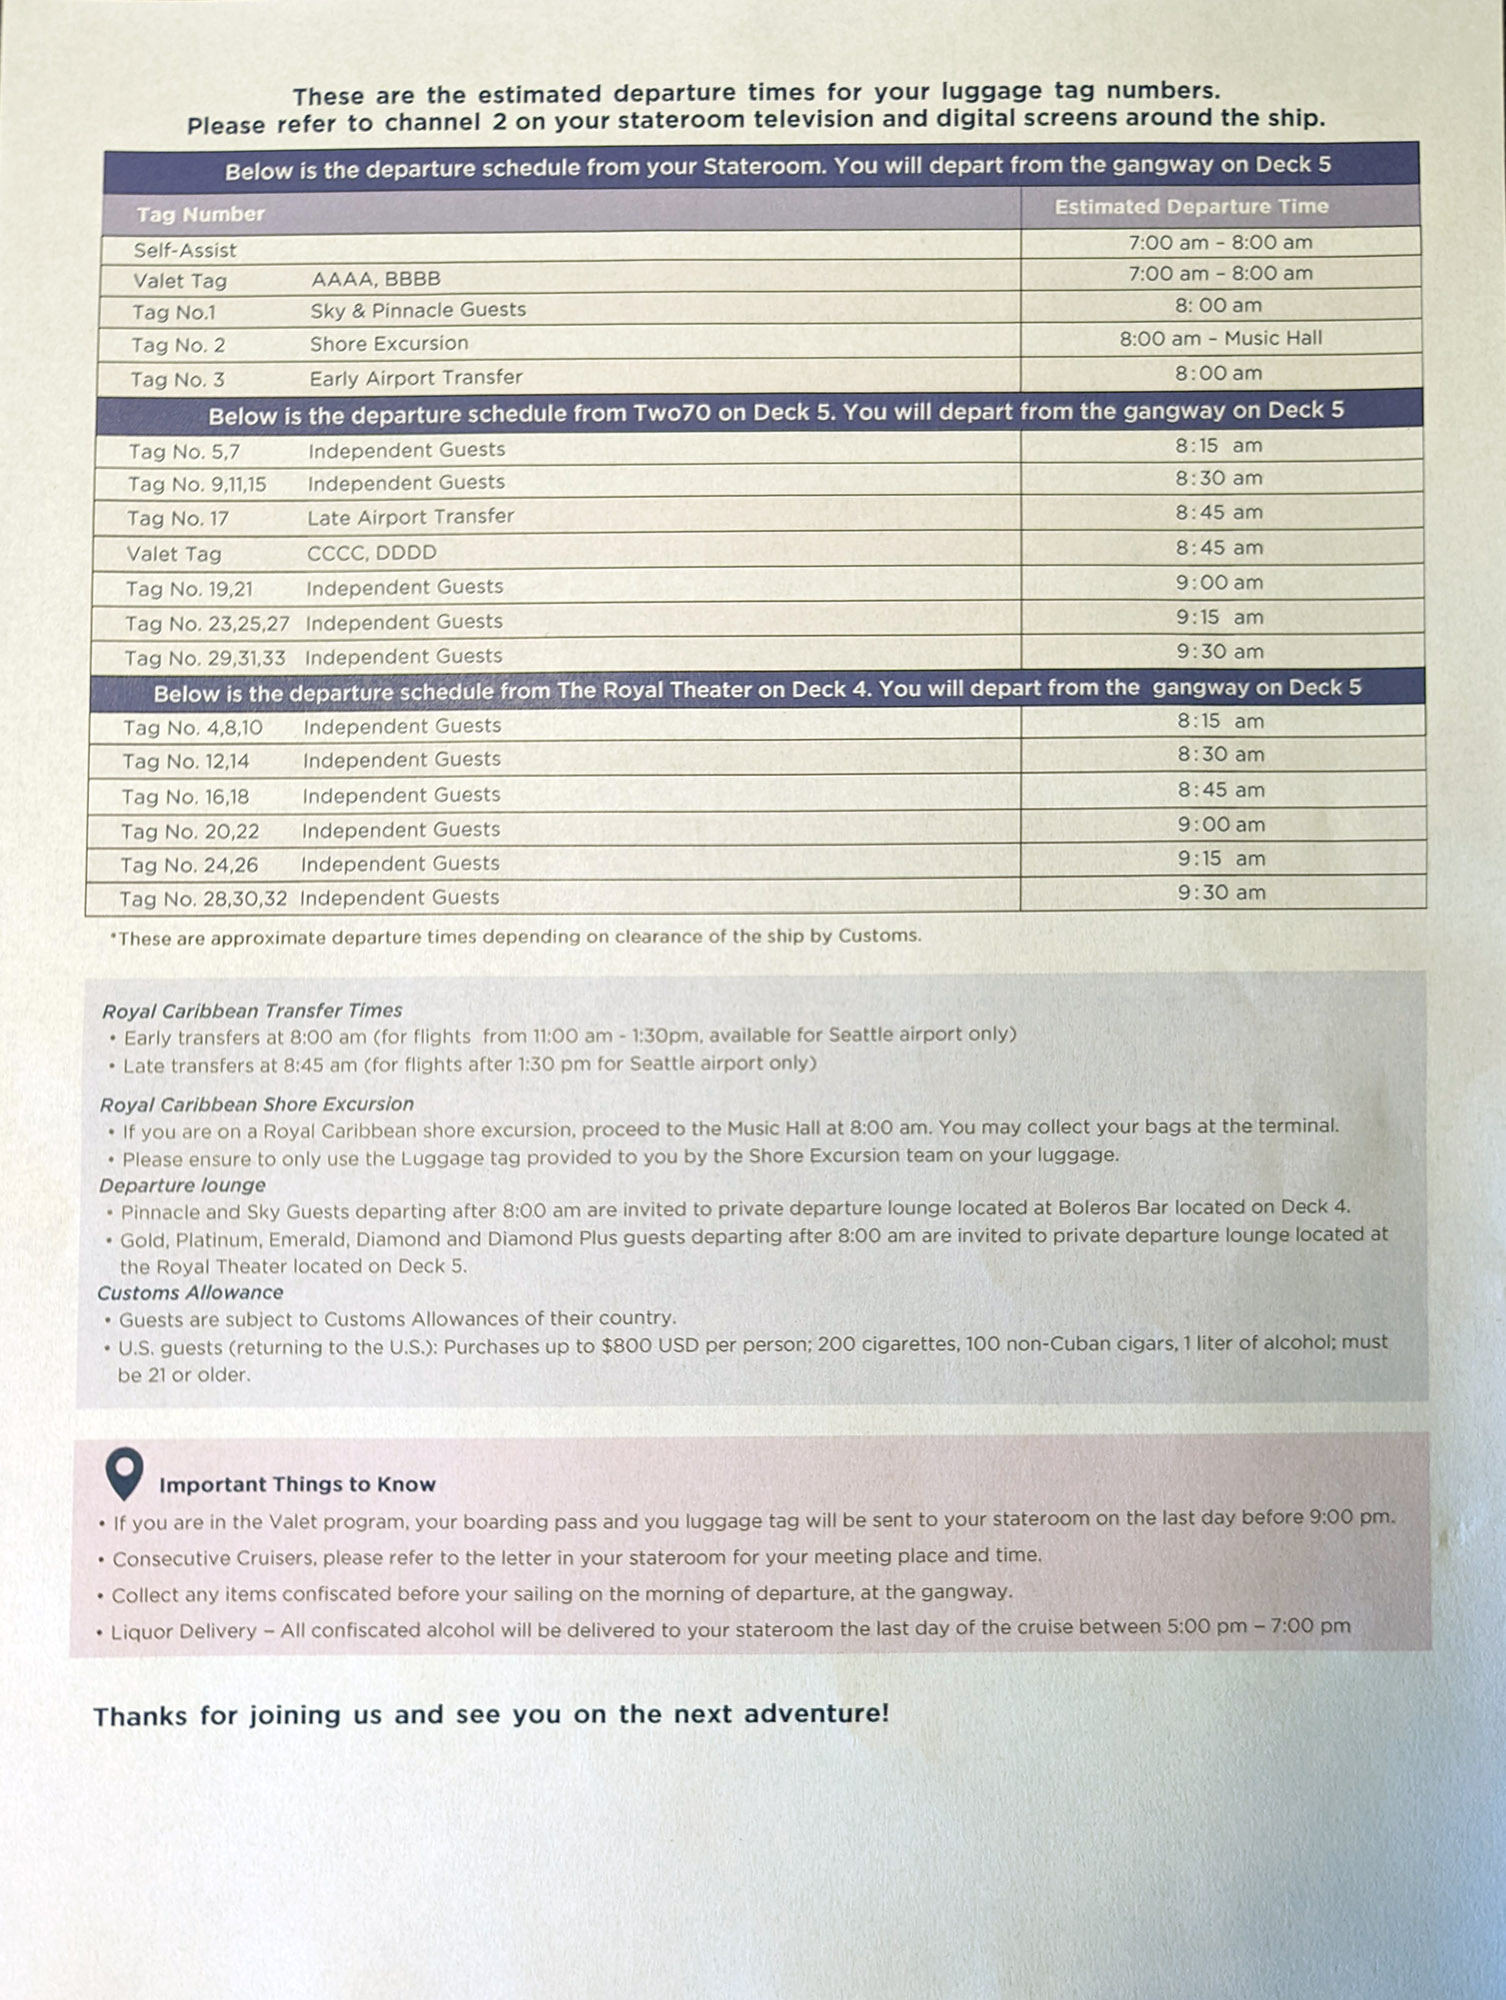
For regular departure, you’re given a luggage tag on the final night of your cruise. That tag has a number on it, which corresponds with the time that you’ll be called to leave the ship. You’ll put the tag on your bags and place them outside your door between 7 PM and 10 PM. The staff will then take your bags, and you’ll pick them up the following day at the cruise terminal. If you have an excursion or airport transfer booked through Royal Caribbean, you will also use this method and get special tags to put on your bag.
Getting off Ovation of the Seas
We chose the regular departure because we weren’t in a rush to get off. Our flight home wasn’t until 9:30 PM, so we planned to spend the day exploring Seattle. Since most things we wanted to do didn’t open until 10 AM, we requested a 9 AM debarkation time. That way, we could stay on the ship and take our time with a leisurely breakfast before exploring Seattle. For our bags, we used Port Valet, which meant they were taken off the ship and sent directly to our plane.
Four different venues were open for breakfast that morning. We could stay in our cabin until 8:30, but we were all packed and hungry, so we headed to the Windjammer Marketplace around 7:30 AM. The Windjammer was crowded, and most tables were full because people were just sitting around. Royal Caribbean asks that instead of taking up room in the restaurants, you wait in on the designated lounges once you’re done eating. Luckily there were tables in the back that were open.
Once we finished breakfast, we stopped at the indoor pool area to sit for a bit. We were there for about 5 minutes before being asked to go to one of the designated areas, so we headed down to our assigned waiting area, the Royal Theater.
The ship was 30 minutes late clearing customs, according to an announcement, but once that cleared up, things went very smoothly. That being said, communication wasn’t the best. The shipwide announcements were few and far between, and there was no designated staff in the Royal Theater. Every 15 minutes or so, someone would just walk in and call a bunch of numbers. It almost felt like we were on our own. It was still a smooth process, but the communication on this ship needs some improvement.
They called our number at 9:10, and we headed out. It took us 5 minutes to walk off the ship through customs and out of the cruise terminal. Customs is a much smoother process than you may have experienced in the past. Now, you just show your passport and SeaPass card to customs officers and keep walking.
One annoying thing was how many people couldn’t understand, or refused to follow, directions. At 9:10, many people tried to take their large suitcases off the ship. This clogged hallways and escalators and had people tripping over them. For this reason, everyone who was self-assist was supposed to be off at 8:00, but some people didn’t listen. For the smoothest possible debarkation experience, follow the rules and stick to the guidelines. Those who rush or try to do things their own way just get frustrated.
Getting to downtown Seattle
Rather than book a shuttle or excursion, we decided to take an Uber from the cruise terminal to the Seattle Center. That’s the part of Seattle that’s a bit north of the downtown area and has a lot of popular tourist attractions like the Space Needle and Museum of Pop Culture.
From the ship to the Uber lot at the cruise terminal, it was a short, 5-minute walk. Once there, we opened the Uber app and requested a ride. Three minutes later, our driver pulled up and parked in a spot. We jumped in the Uber and were on our way. The whole process was really simple. The ride to the Museum of Pop Culture cost $17 and took 20 minutes.
Museum of Pop Culture (MoPOP)
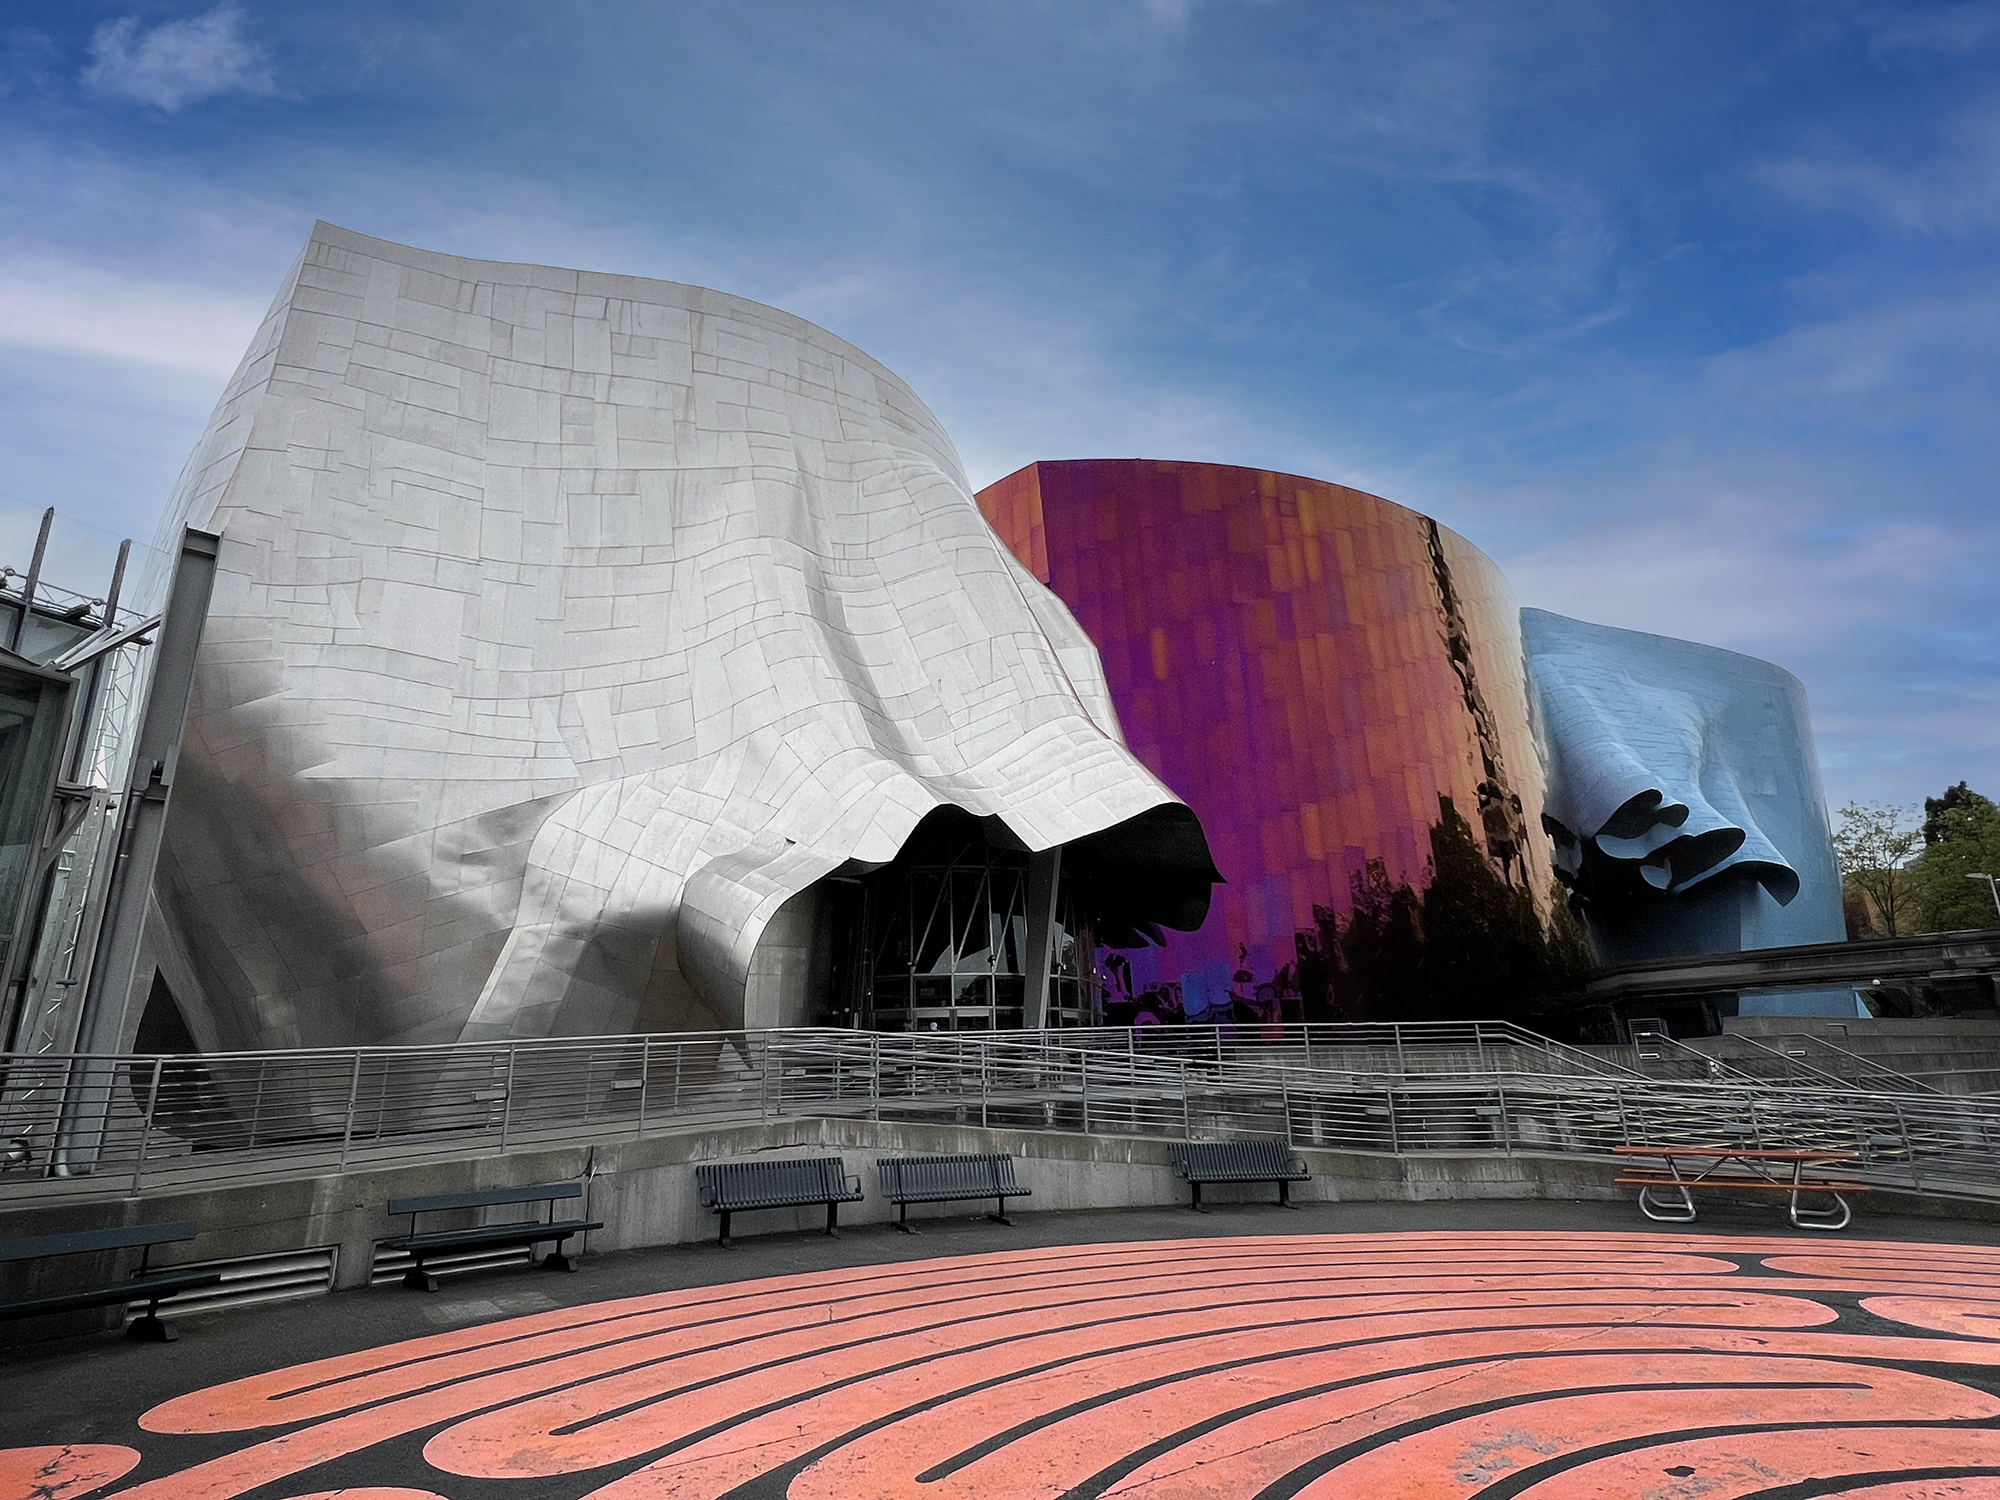
The only thing I knew about the Museum of Pop Culture was that the building had a unique look. Its structure and shape vary around the building, with whimsical designs and shapes. Sheets of metal are bent to resemble fabric blowing in a gentle breeze. So even if you don’t go into the museum, definitely stop by and look at the building. It’s right next to the Space Needle, so you don’t have to go far.
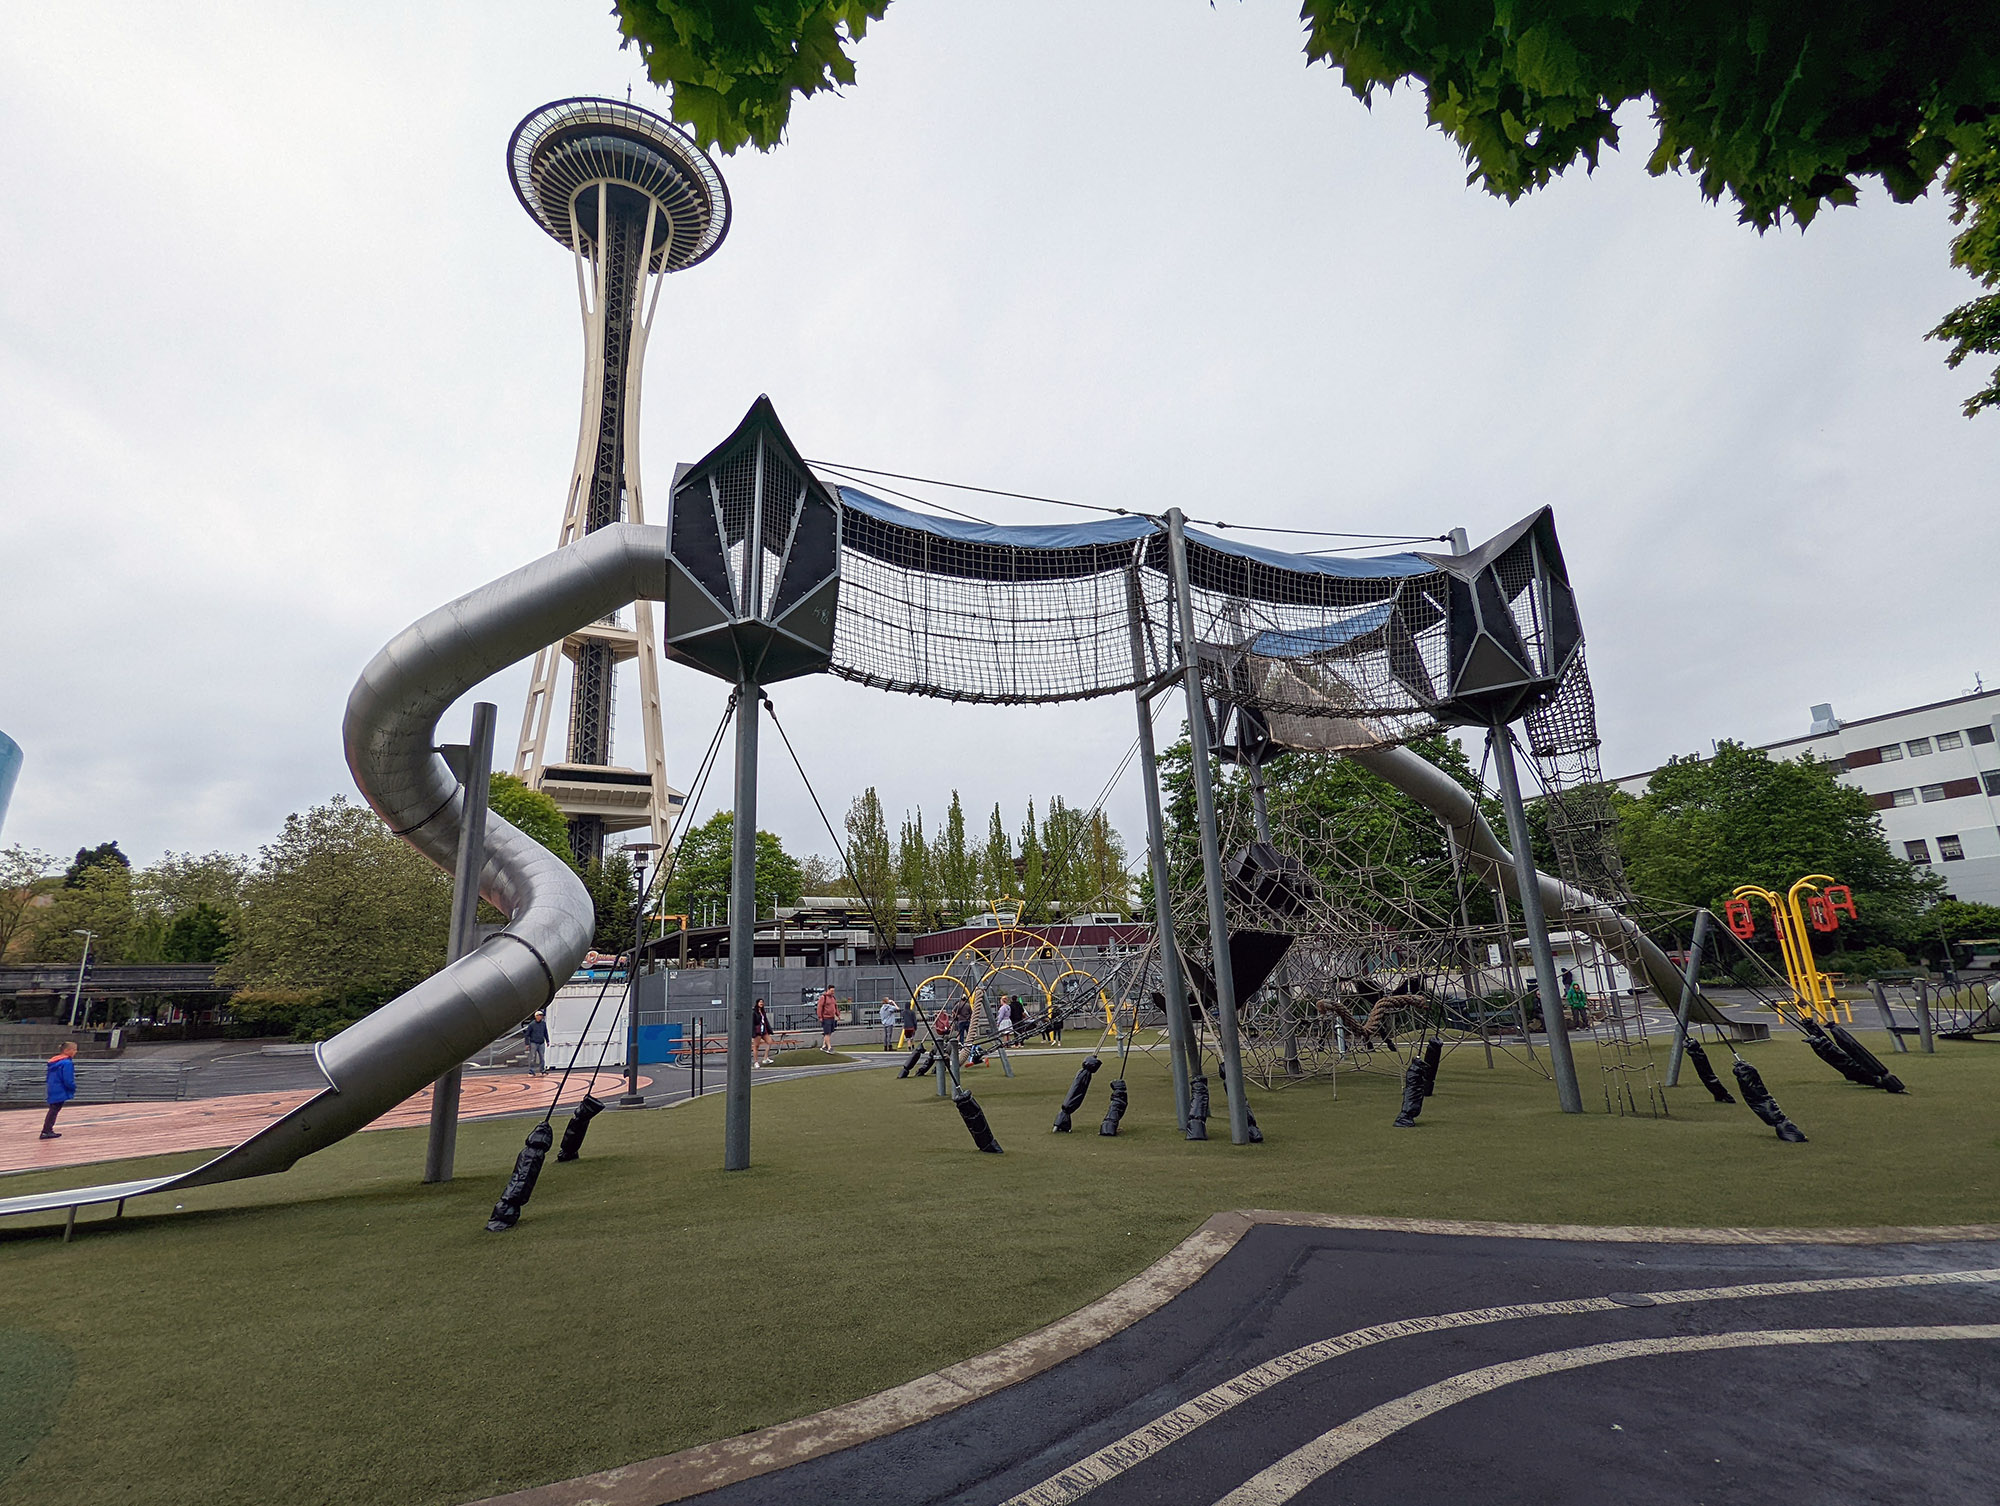
Tip: If you have kids, stop by the huge playground next to MoPOP. It’s free and has some fun features and activities for them.
Ticket prices can vary depending on the date and time you want, but they’re usually $25 – $35 per adult, with kids between $15 – $20.
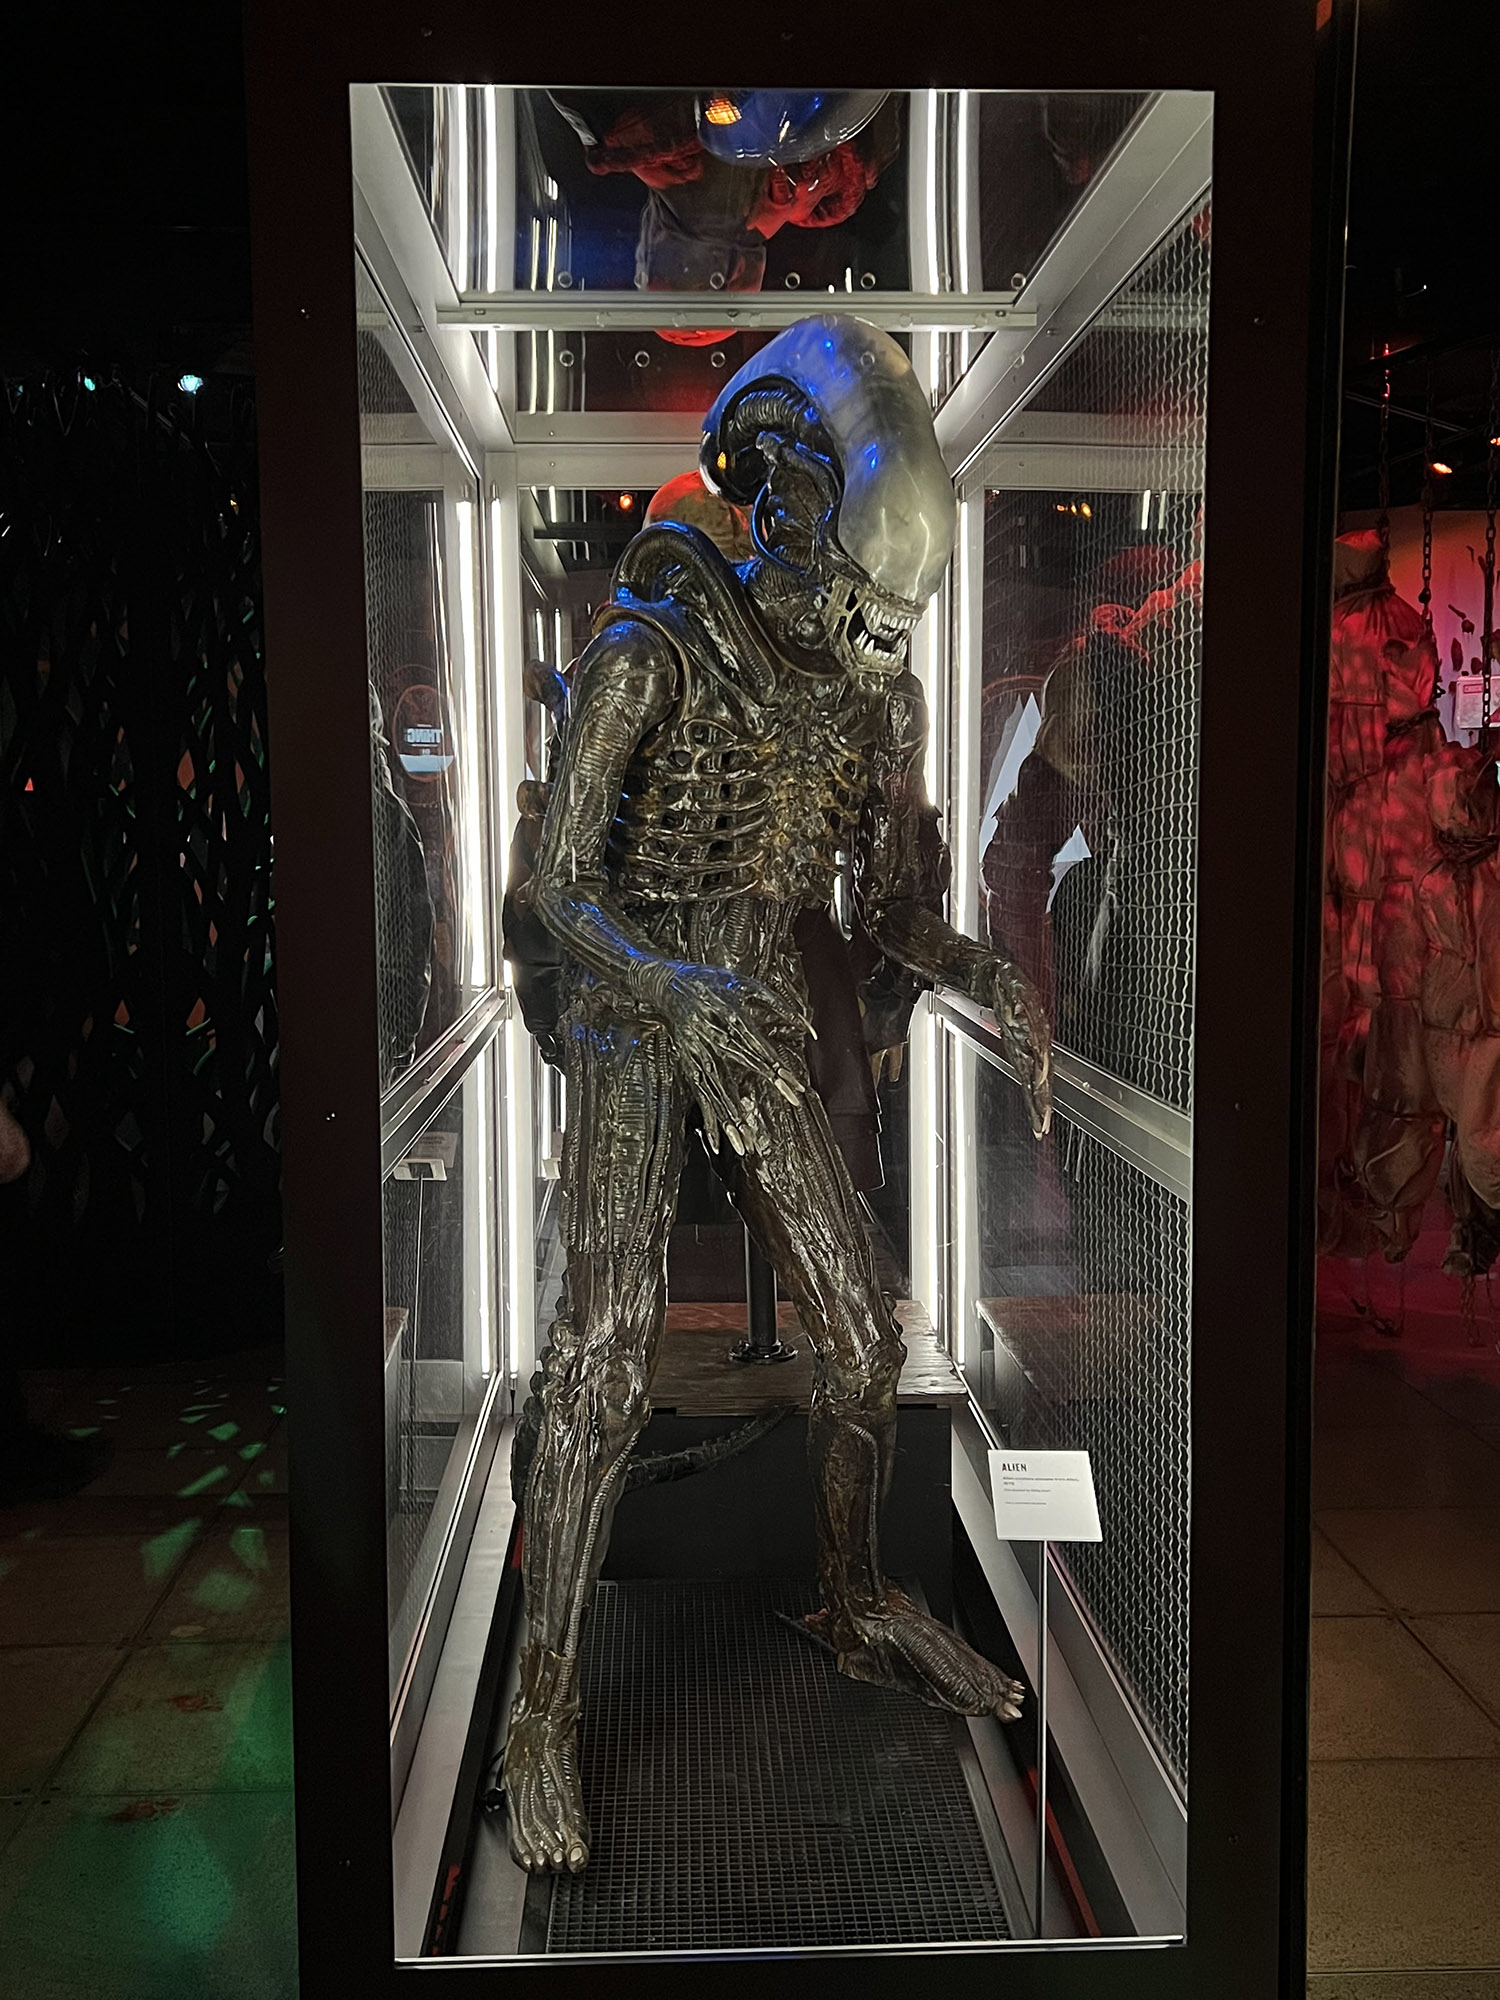
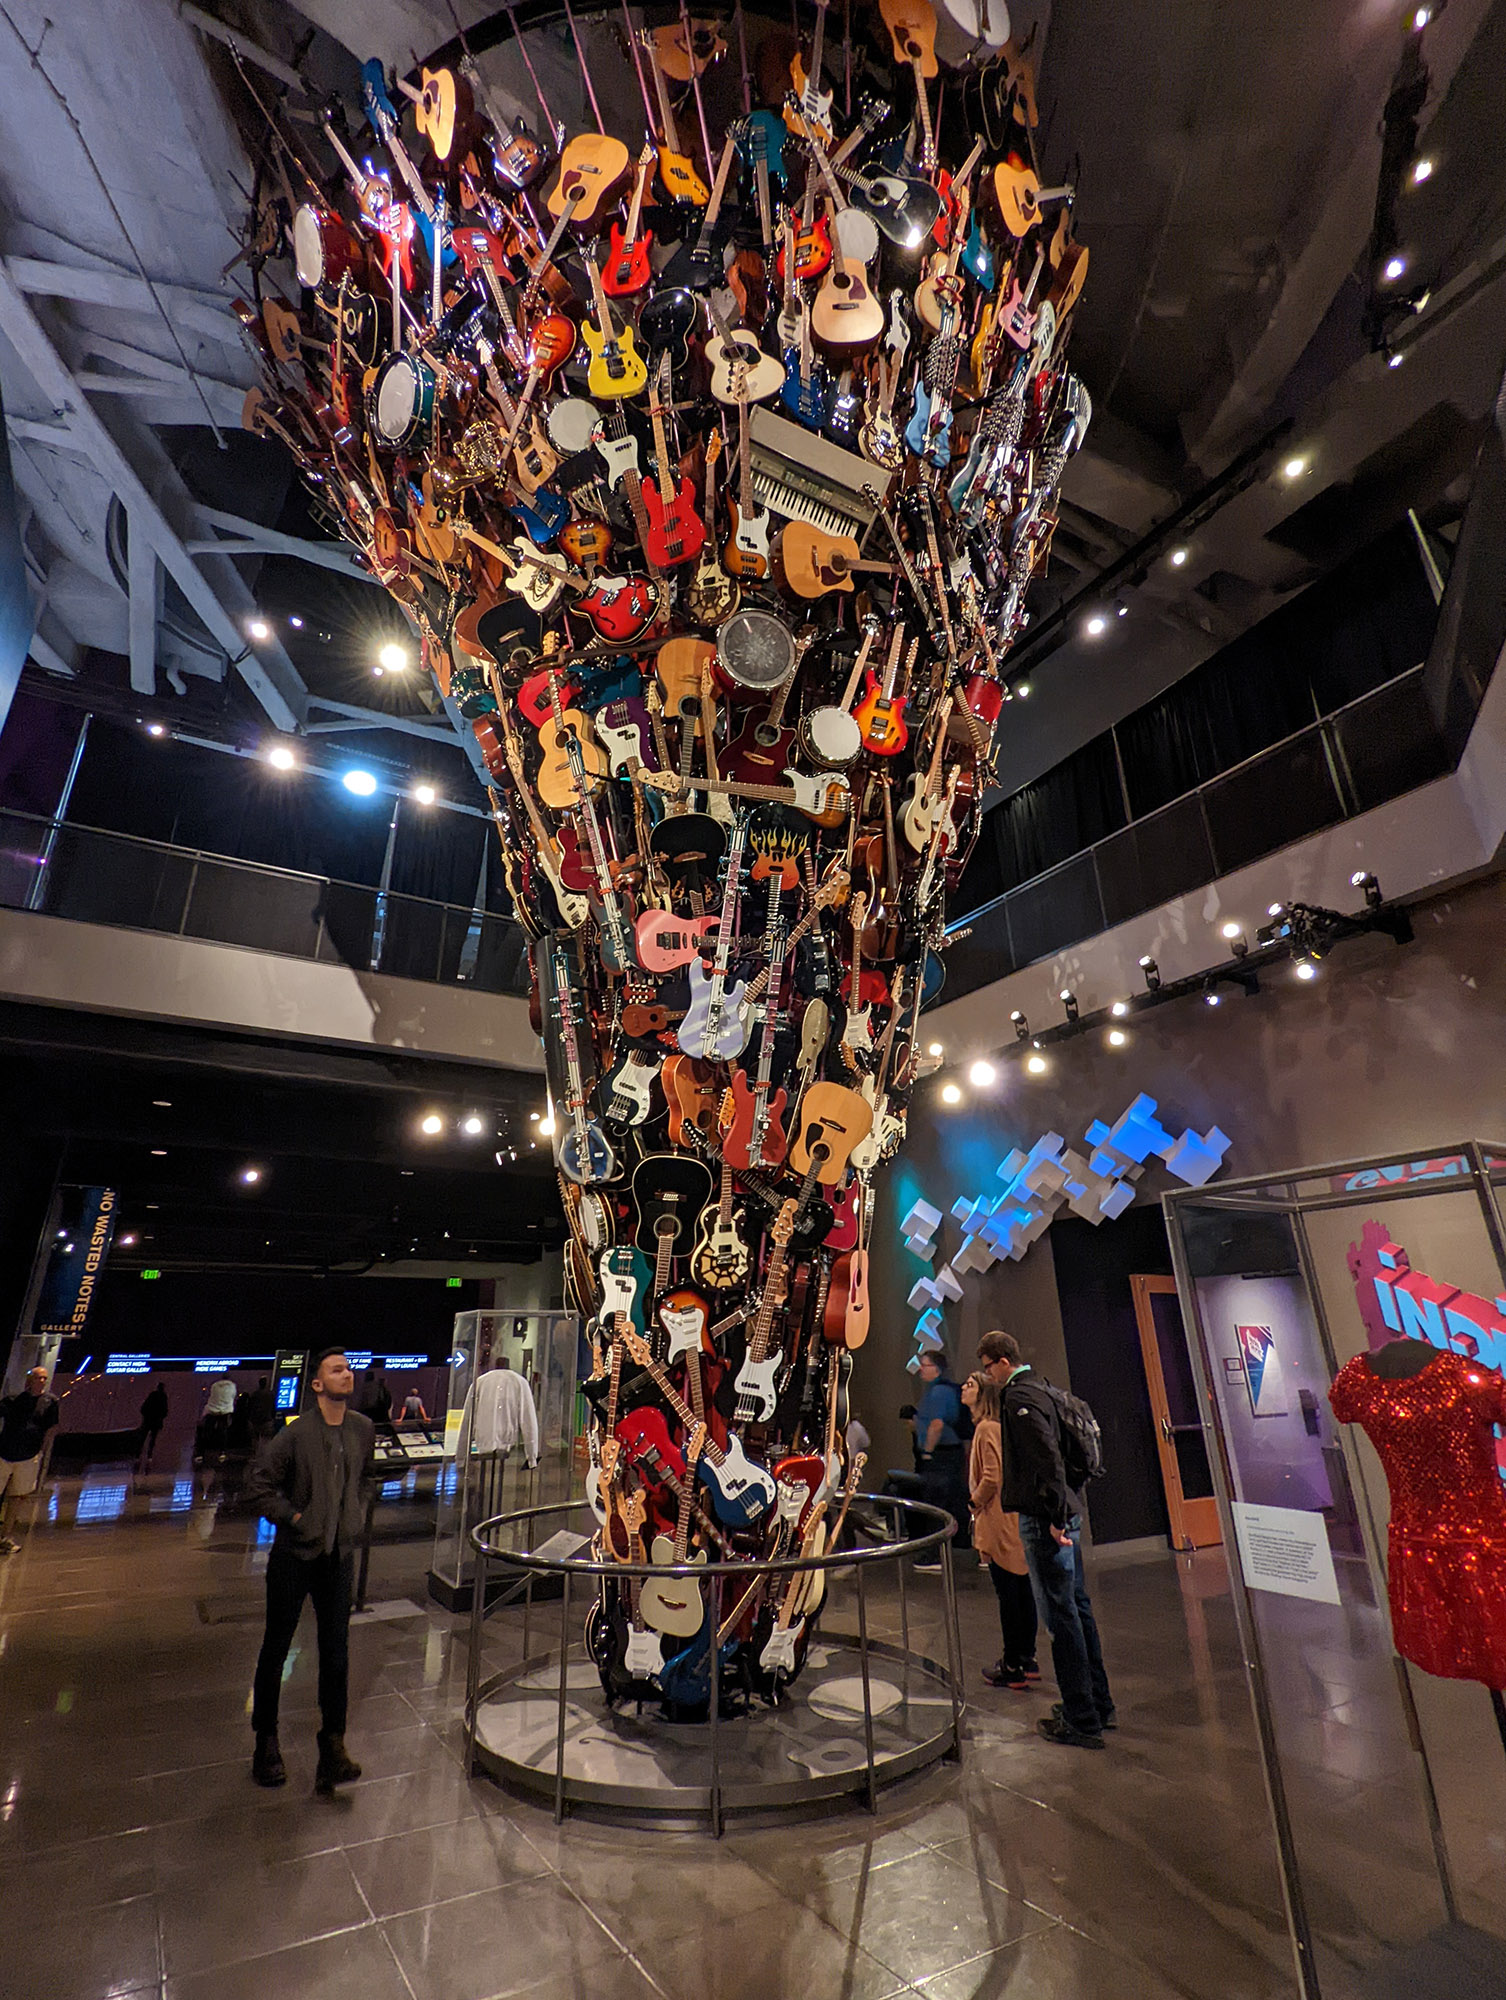
MoPOP is dedicated to contemporary popular culture, and although it has a very heavy music focus, there are also many exhibits on TV and film. If you like the exterior of the building, the interior is just as meticulously planned with really well-themed spaces. The Sci-Fi, Horror, and Fantasy exhibits were each designed to immerse you in the world; it doesn’t feel like a real museum at all; it’s more like a TV show set. The musical exhibits, like those dedicated to Nirvana, Jimmy Hendrix, and Pearl Jam, were more straightforward in design but had some fascinating information.
Overall, we spent 3 hours exploring the museum and learned quite a bit. It was definitely worth the price of admission.
Space Needle
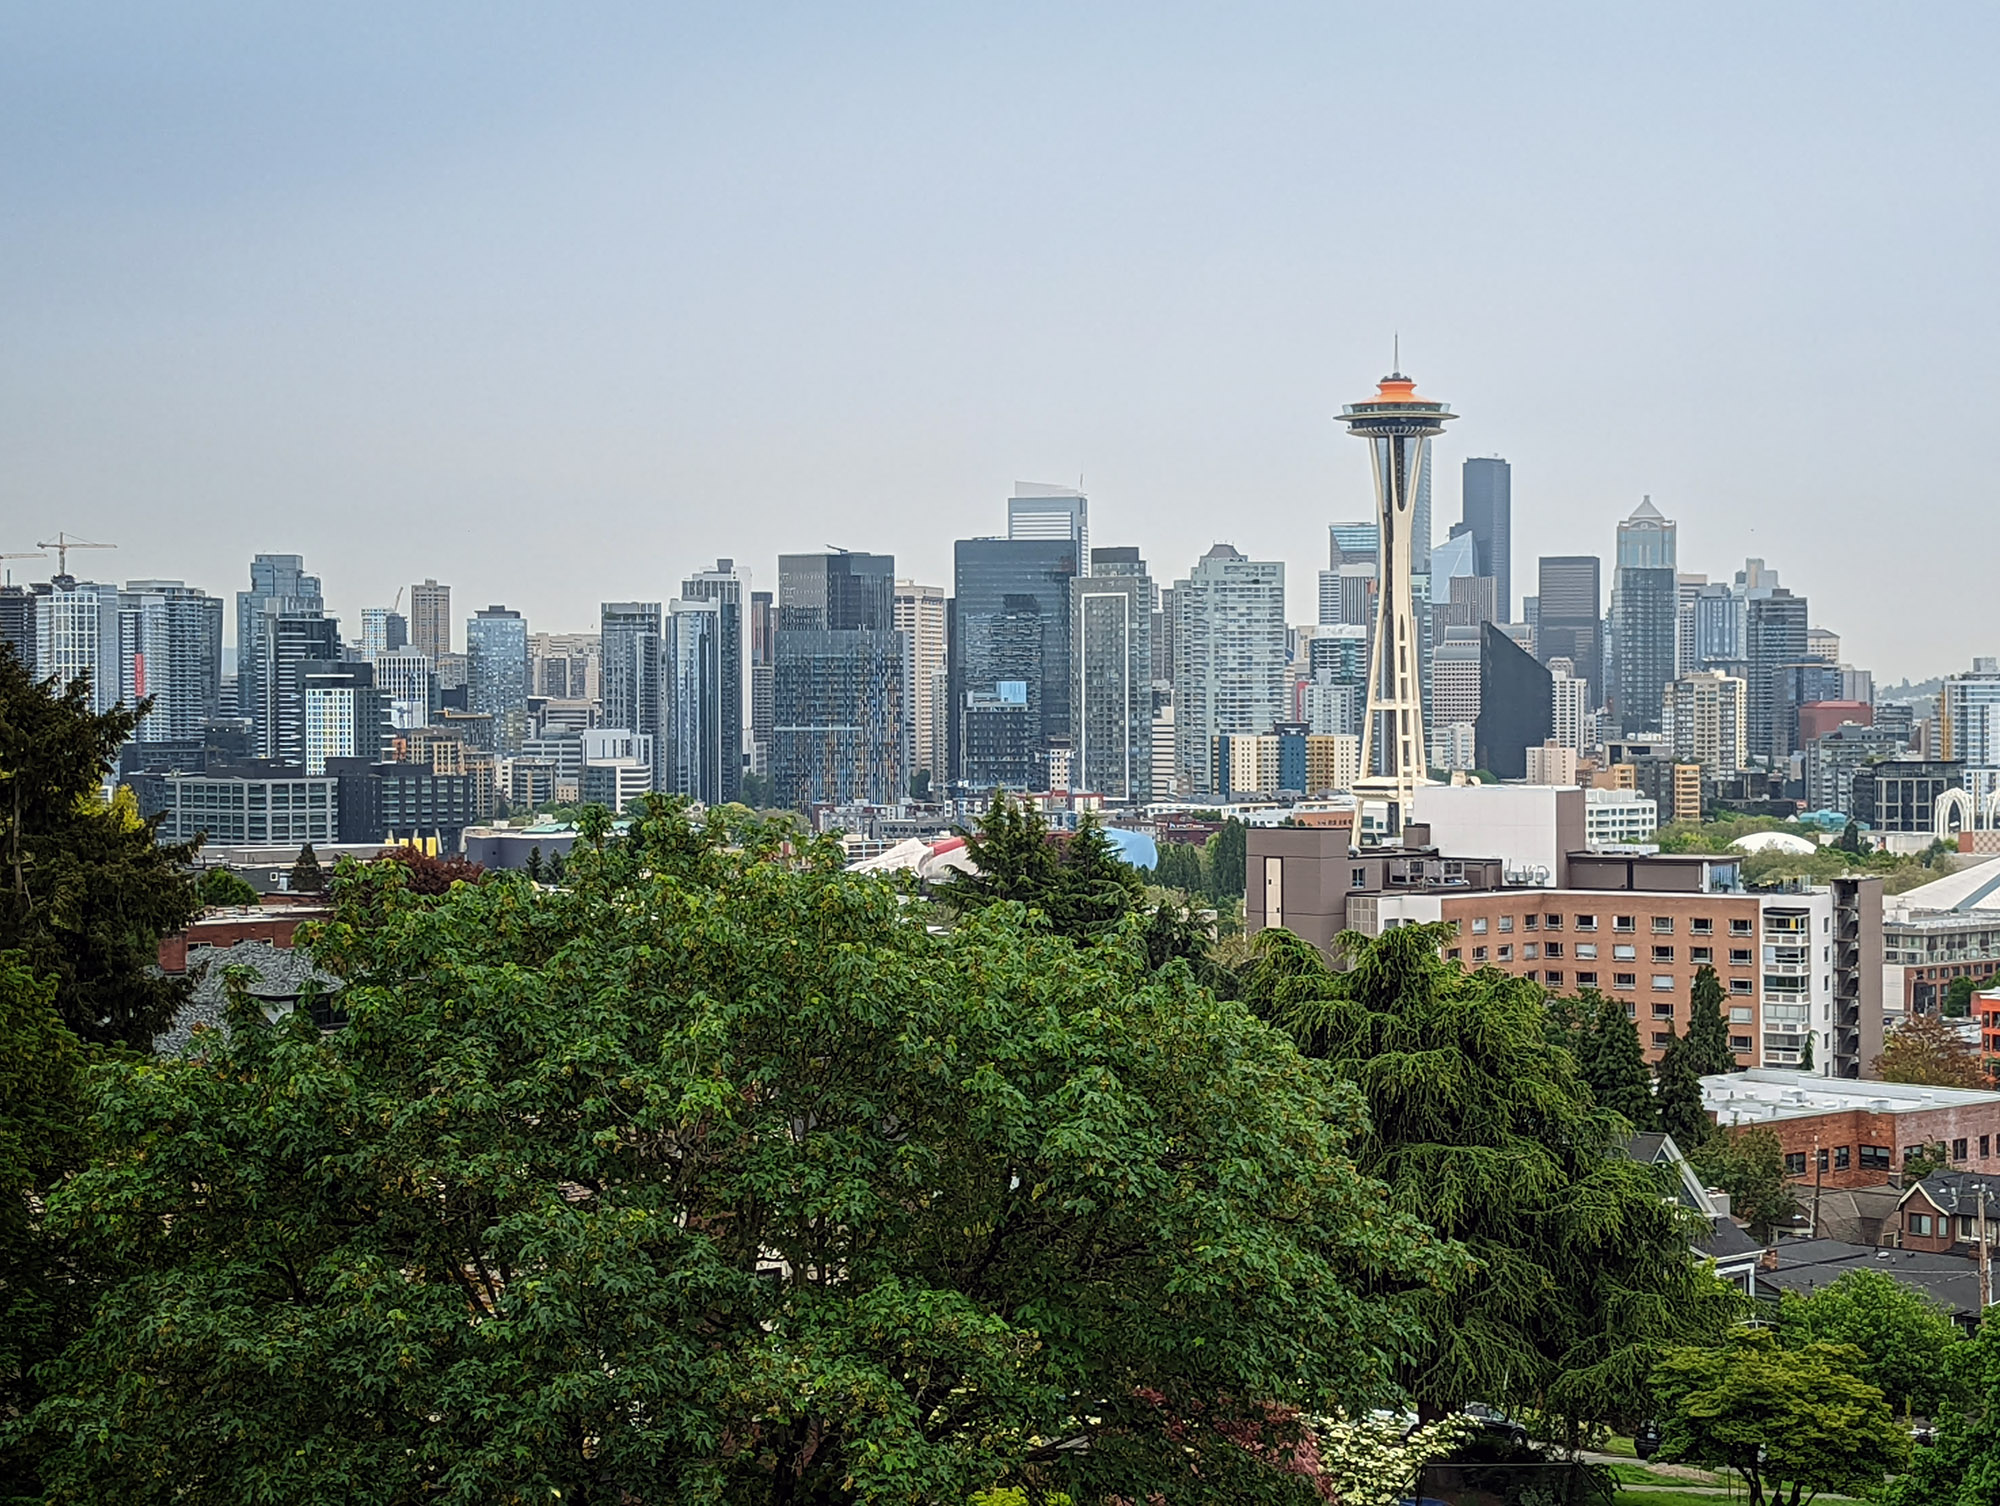
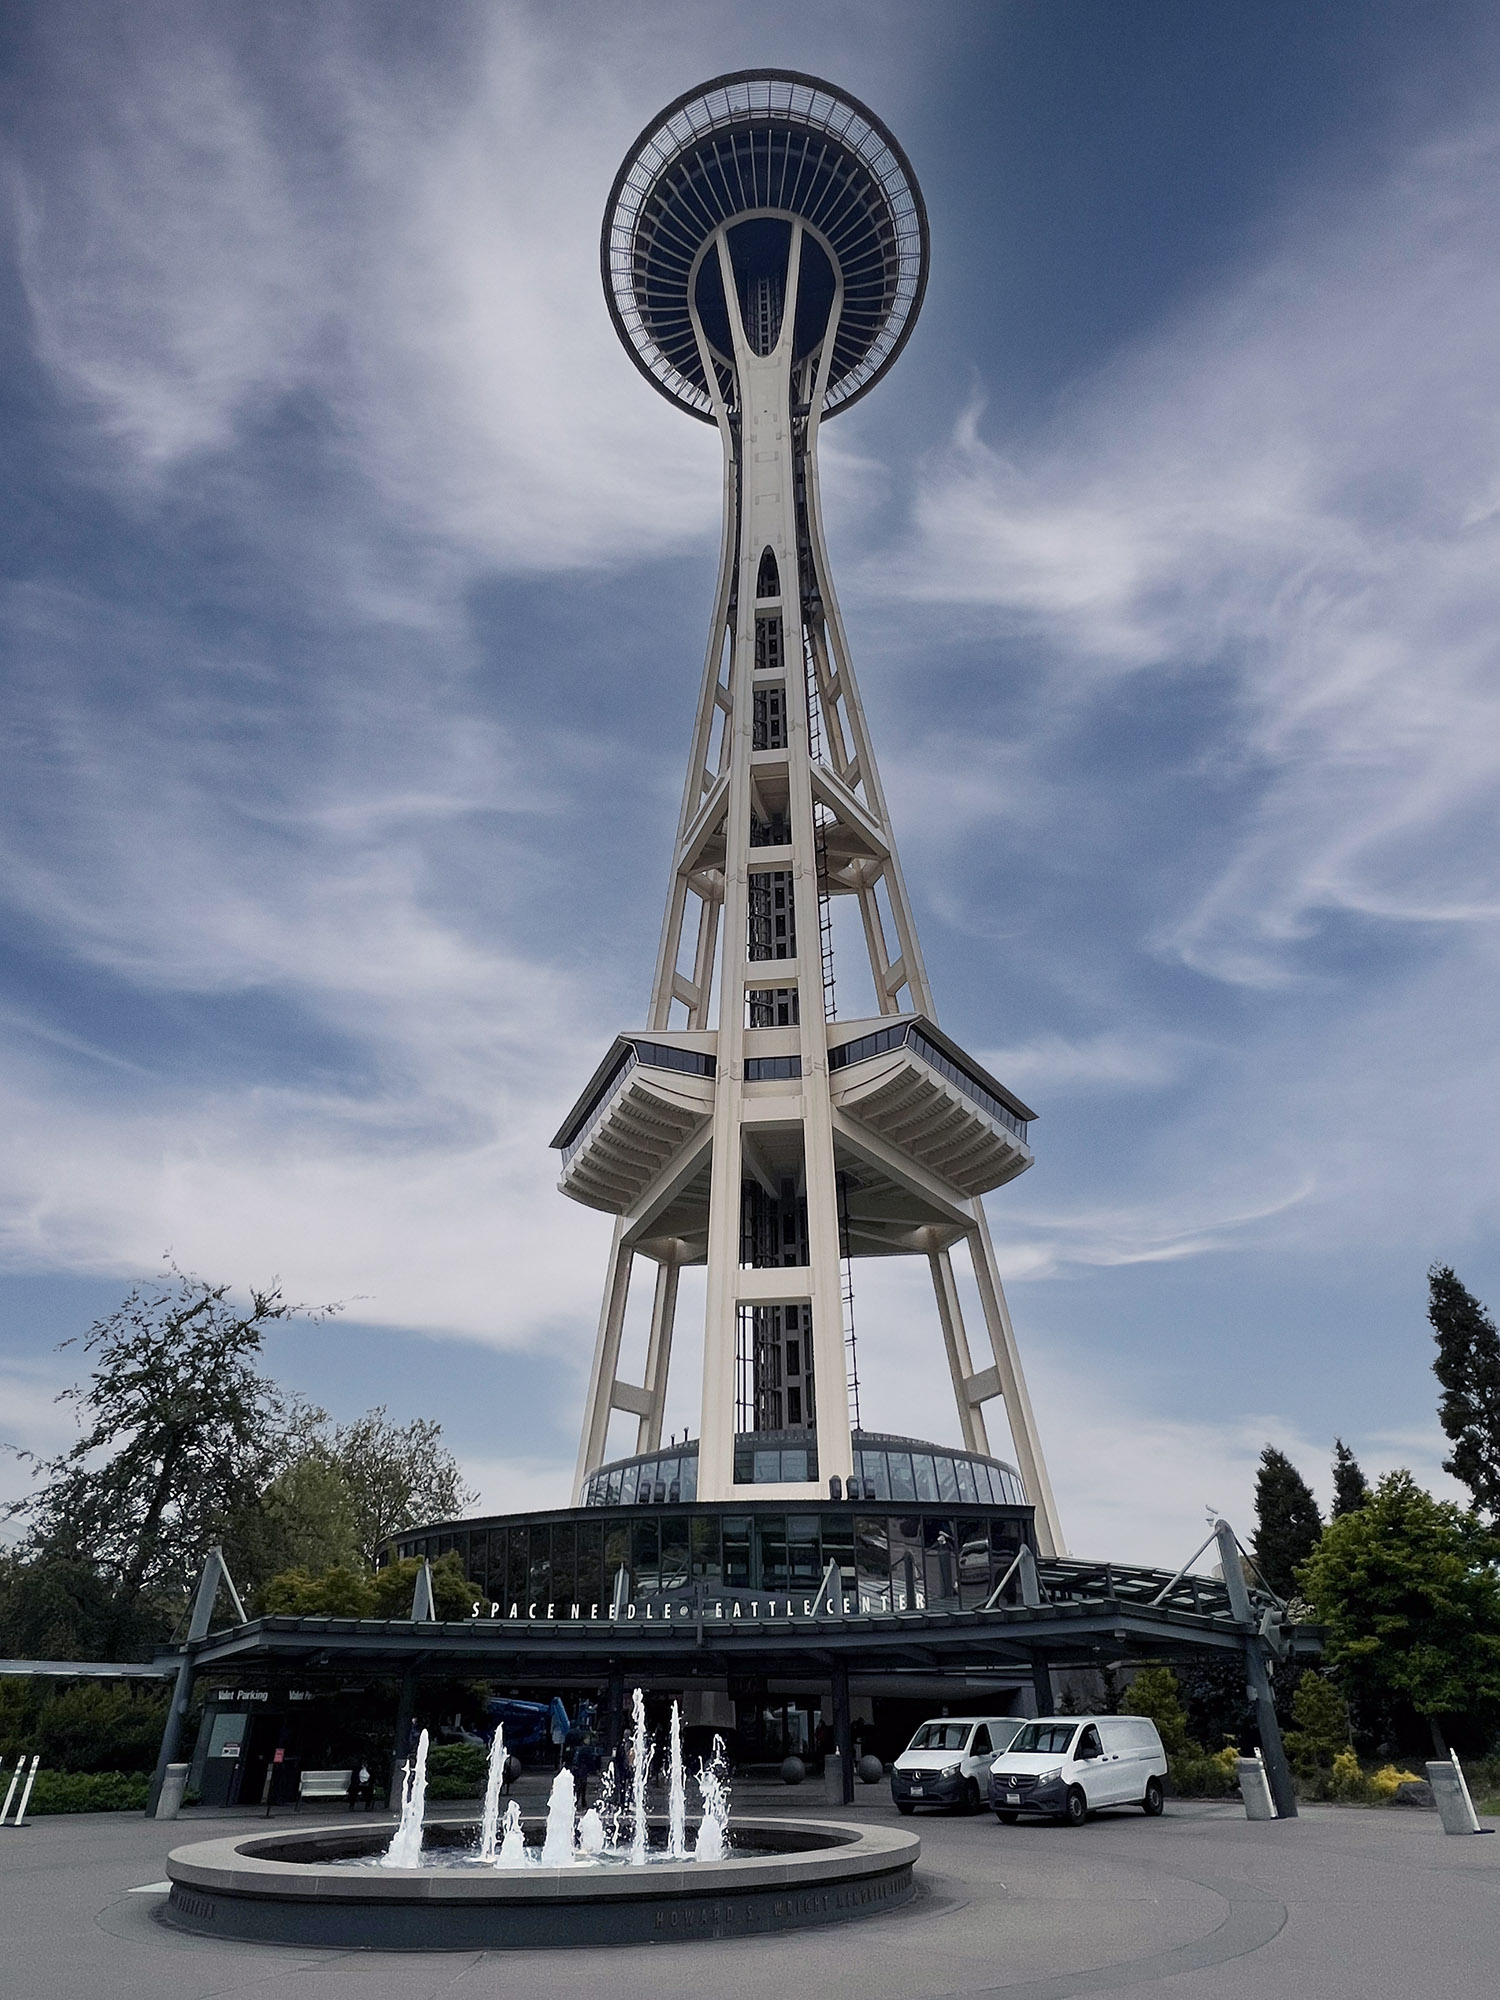
Next up was the Space Needle. I’ll admit, visiting this attraction wasn’t high on my list. But the Space Needle has dominated the Seattle skyline since it was built in 1961, so I felt like I had to go up in it.
At 605 feet tall, the Space Needle isn’t all that high in the grand scheme of things. It’s half the height of the Empire State Building and one-third of the height of the CN Tower in Toronto. But, it is one of the highest structures in Seattle and gives some of the city’s best views.
Using the Space Needle’s website, we booked a two-attraction pass. The one ticket would give us access to the Space Needle and also Chihuly Glass and Garden. The cost was $57 for adults and $35 for kids. When you book, you have to select a 15-minute window when you will arrive at the Space Needle. However, you don’t need to choose the time for the Chihuly Glass and Garden.
We went to the Space Needle and walked around its base to find the entrance. There were handrails that could be used to contain the line, but at this point, we just breezed by all of them. The only line we experienced was a short one to get through security.
The hallway leading to the elevators was lined with signage about the Space Needle. They detailed how, and why, it was built. These exhibits made sense on a day when there were long lines, but with no lines, people were just rushing through them. I don’t think most people realized those signs were supposed to be part of the exhibit. Once you got upstairs, the focus was more on the view, and there wasn’t a lot of stuff to read or see up there otherwise.
We finished reading the signs and lined up for the elevator ride. Before we got there, we stopped to pose for a free picture on our way up. It was a short wait, less than 5 minutes, and then we were on our way up.
You have access to two floors when you visit the Space Needle. You first get let out on the higher of the two levels. This floor is a bright white concourse that loops all the way around; it almost resembles an Apple store. This level also had a cafe you could stop at for snacks or beverages. The outside walls are floor-to-ceiling glass, and it’s here you can exit to walk outside around the Space Needle. The outdoor area has high, clear glass partitions. I prefer it to the fences or gates that other towers like the Empire State Building use because it is crystal clear and much more immersive.
Around the outside loop, there are a bunch of glass benches you can sit on for a unique photo opportunity, and they even have two selfie cameras positioned stationed around that you can use for free. The glass protects you from the high winds, but it’s open on top, so you’ll still get wet if it’s drizzling or raining.
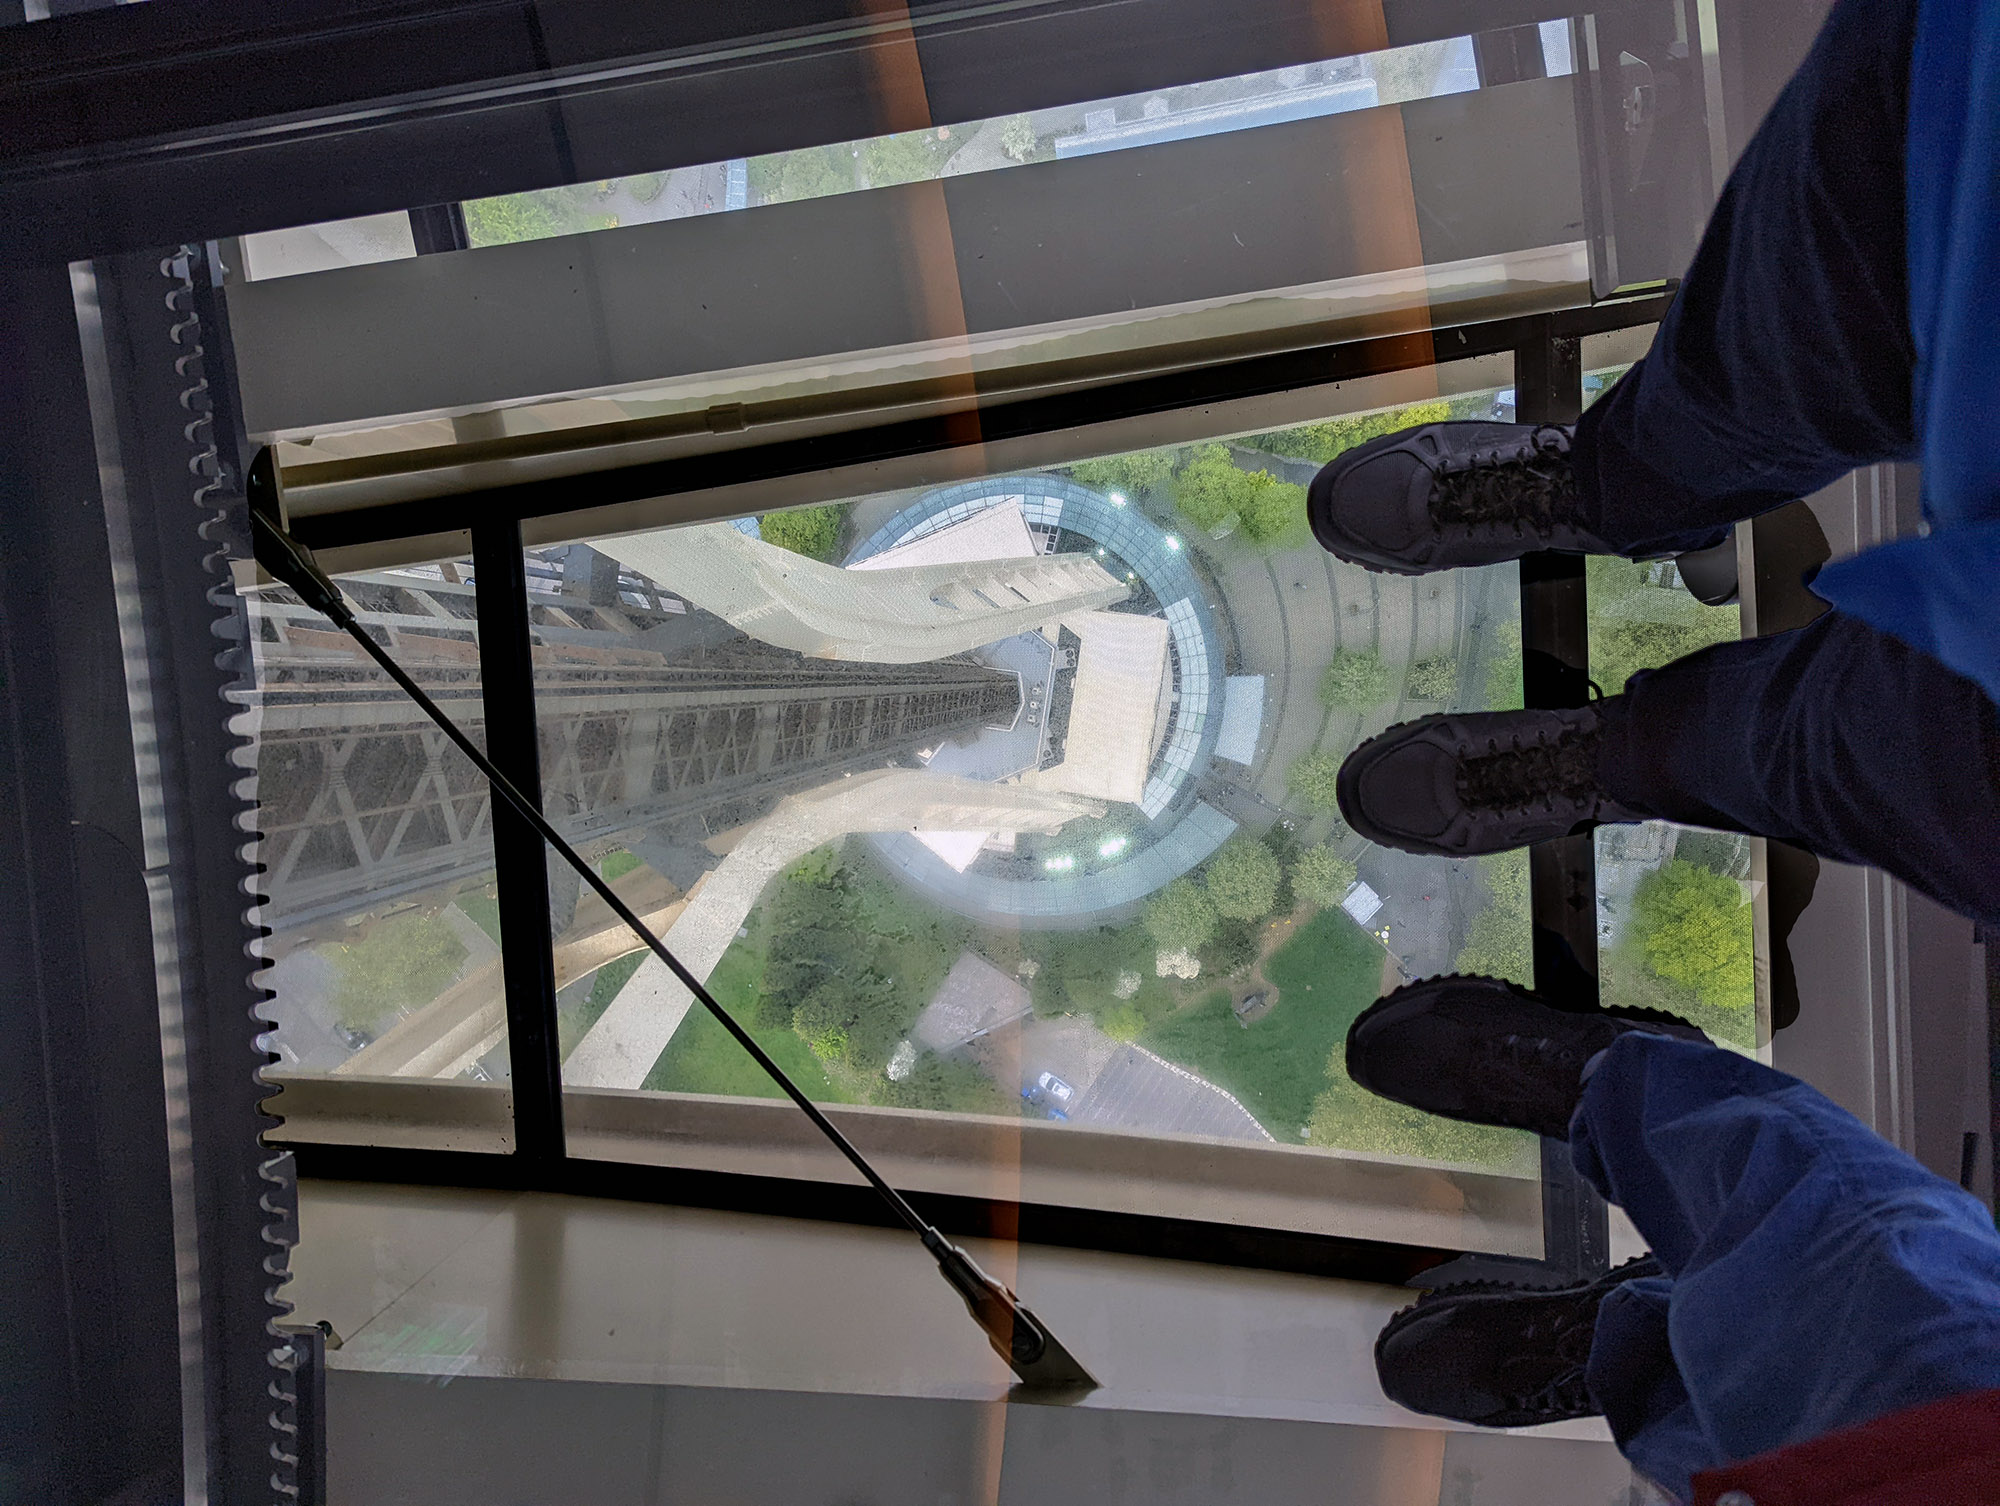
Once you’re done with that level, you walk down the stairs one level to find the only rotating glass floor in the world. You can step out to the slowly revolving platform and see 600′ down to the pavement beneath you. It’s a bit intimidating, but the structure is very solid. This level is much darker than the one upstairs, so you can see the views through the glass. Here, you can stay in one spot and get a 360-degree view of Seattle or take a walk around yourself. Part of this floor is used as a restaurant in the evening. Since anyone can access this level with a normal pass, I don’t see the value in having dinner up there.
We spent about 45 minutes at the Space Needle and then headed down.
Chihuly Glass and Garden
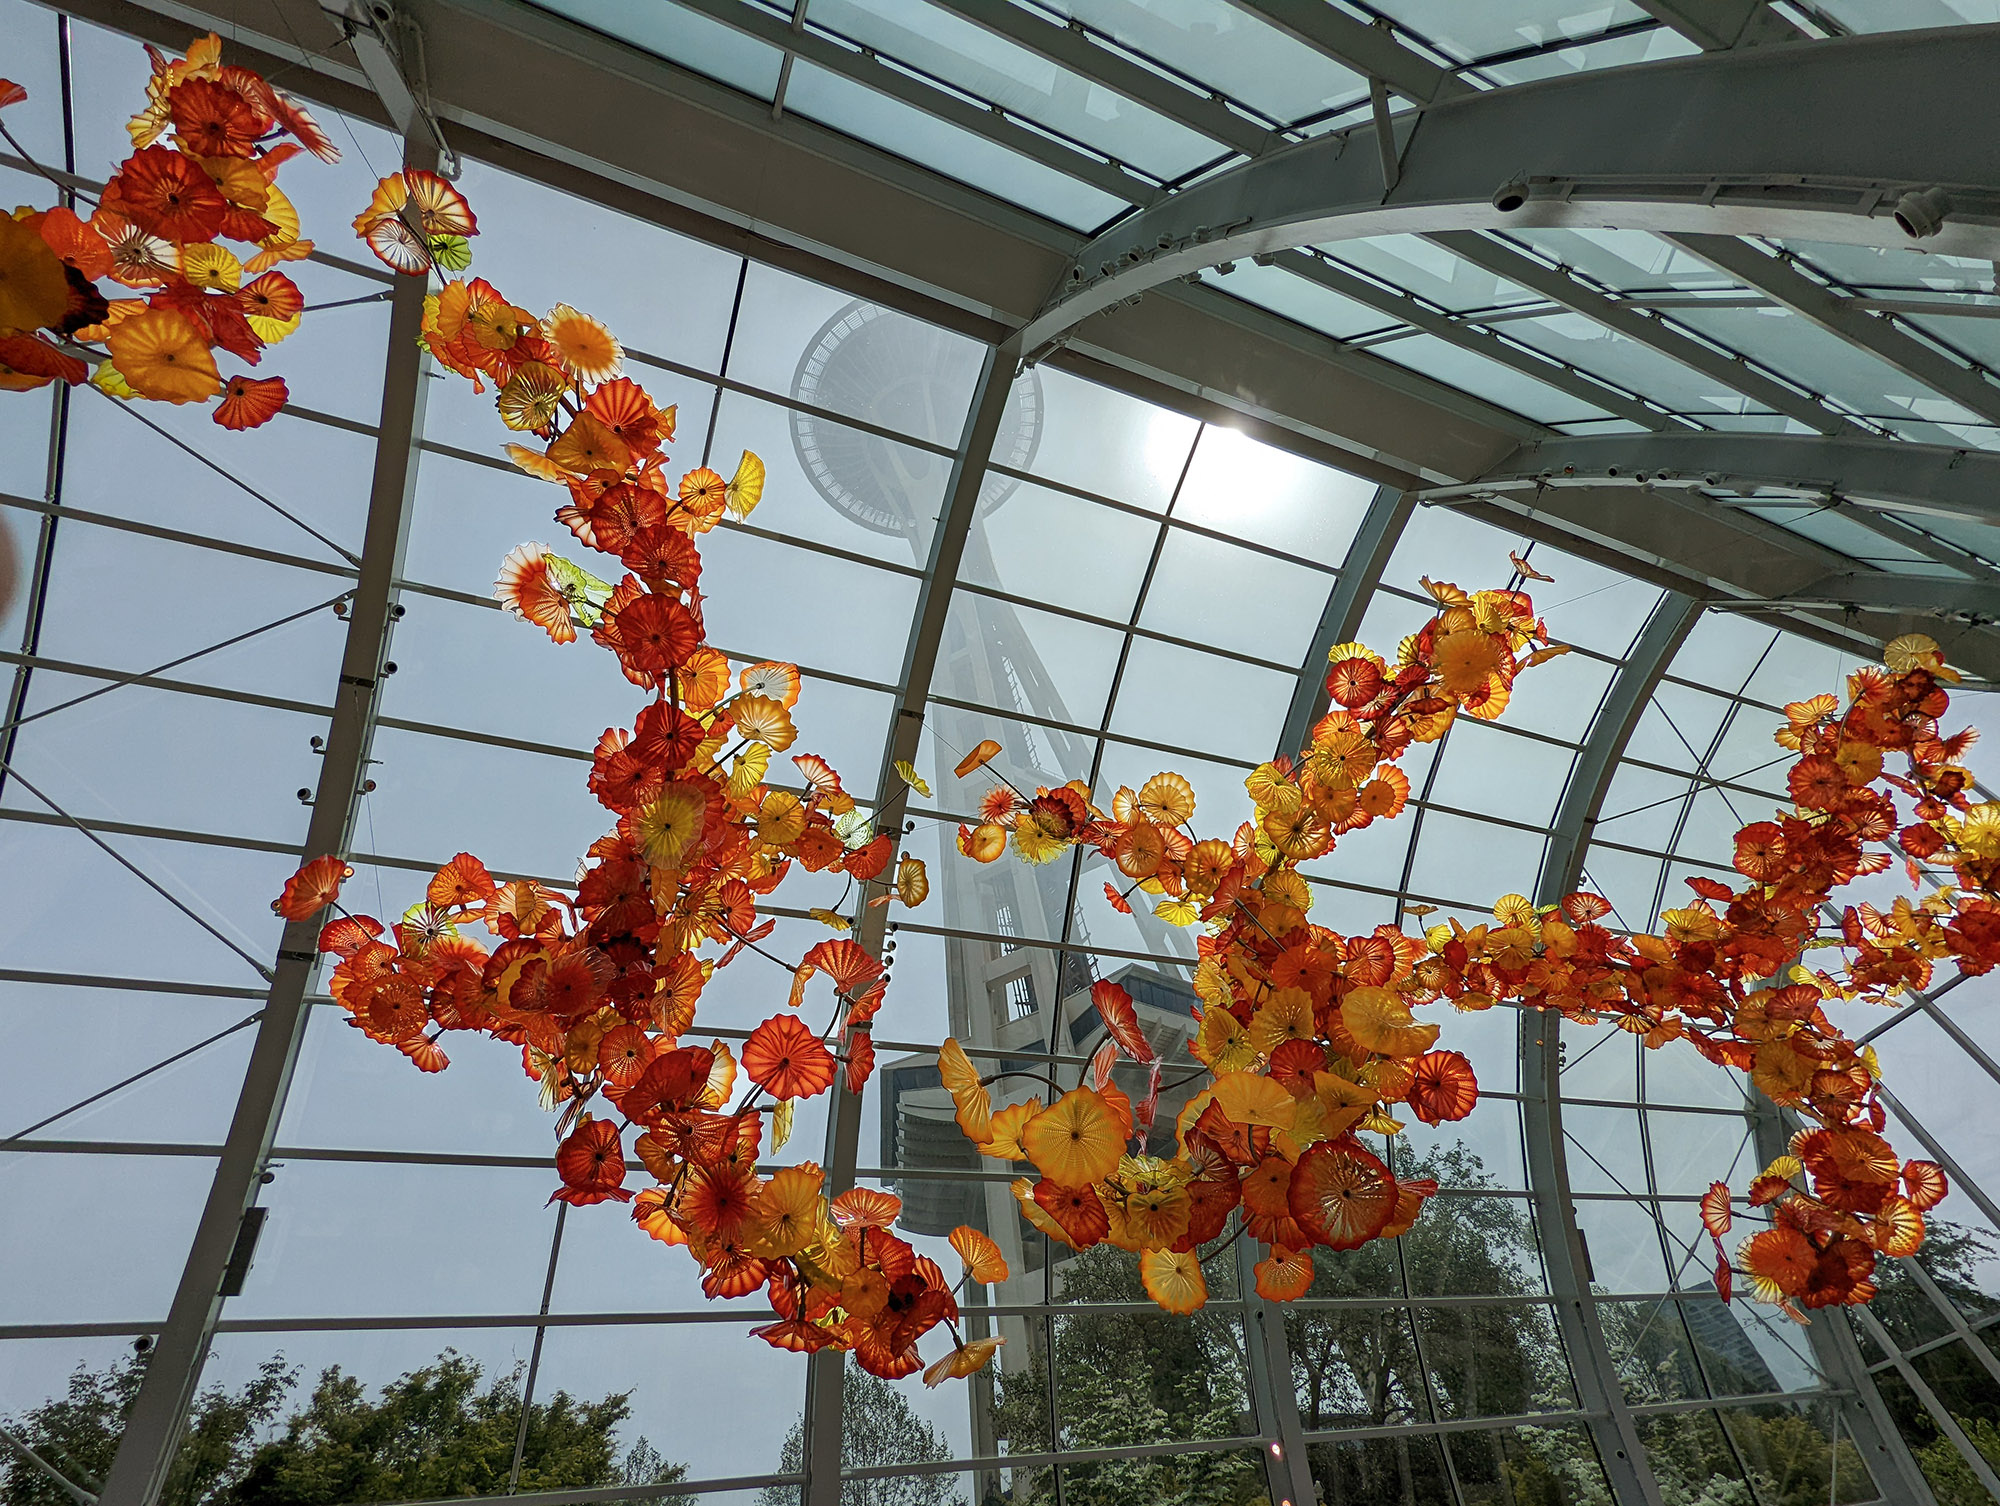
By far, the Chihuly Glass & Garden exhibit was one of my favorite things in Seattle. The space features the works of Dale Chihuly, a prominent Seattle-born glass blower. Using form and color, he creates exquisite glass pieces of all sizes, from a small paper-weight-like piece to a towering 100′ work of glass. This space was added to Seattle Center in 2012 to compliment the Space Needle and bring more for tourists to do in the area.

You progress through the museum room by room, exploring different exhibits he put together, some for other museums in the past, some specifically for this installation. The works are impressive, and the level of detail and intricacy in some of his designs are mind-blowing. The scale is just as awe-inspiring. Some of the exhibits are huge and expansive. It’s hard to imagine the amount of work that had to go into these pieces.
Tip: Bring headphones to Chihuly Gardens. They have a free audio tour can you do with your smartphone.
The second half of the exhibit is the Garden, where glass sculptures and living plants work together to create a unique, otherworldly landscape. You can walk along a path in the Garden to see the different trees and flowers and how they’re accented with glass installations. It was a beautiful sunny day when we went, and each piece of glass was shimmering in the sunlight.
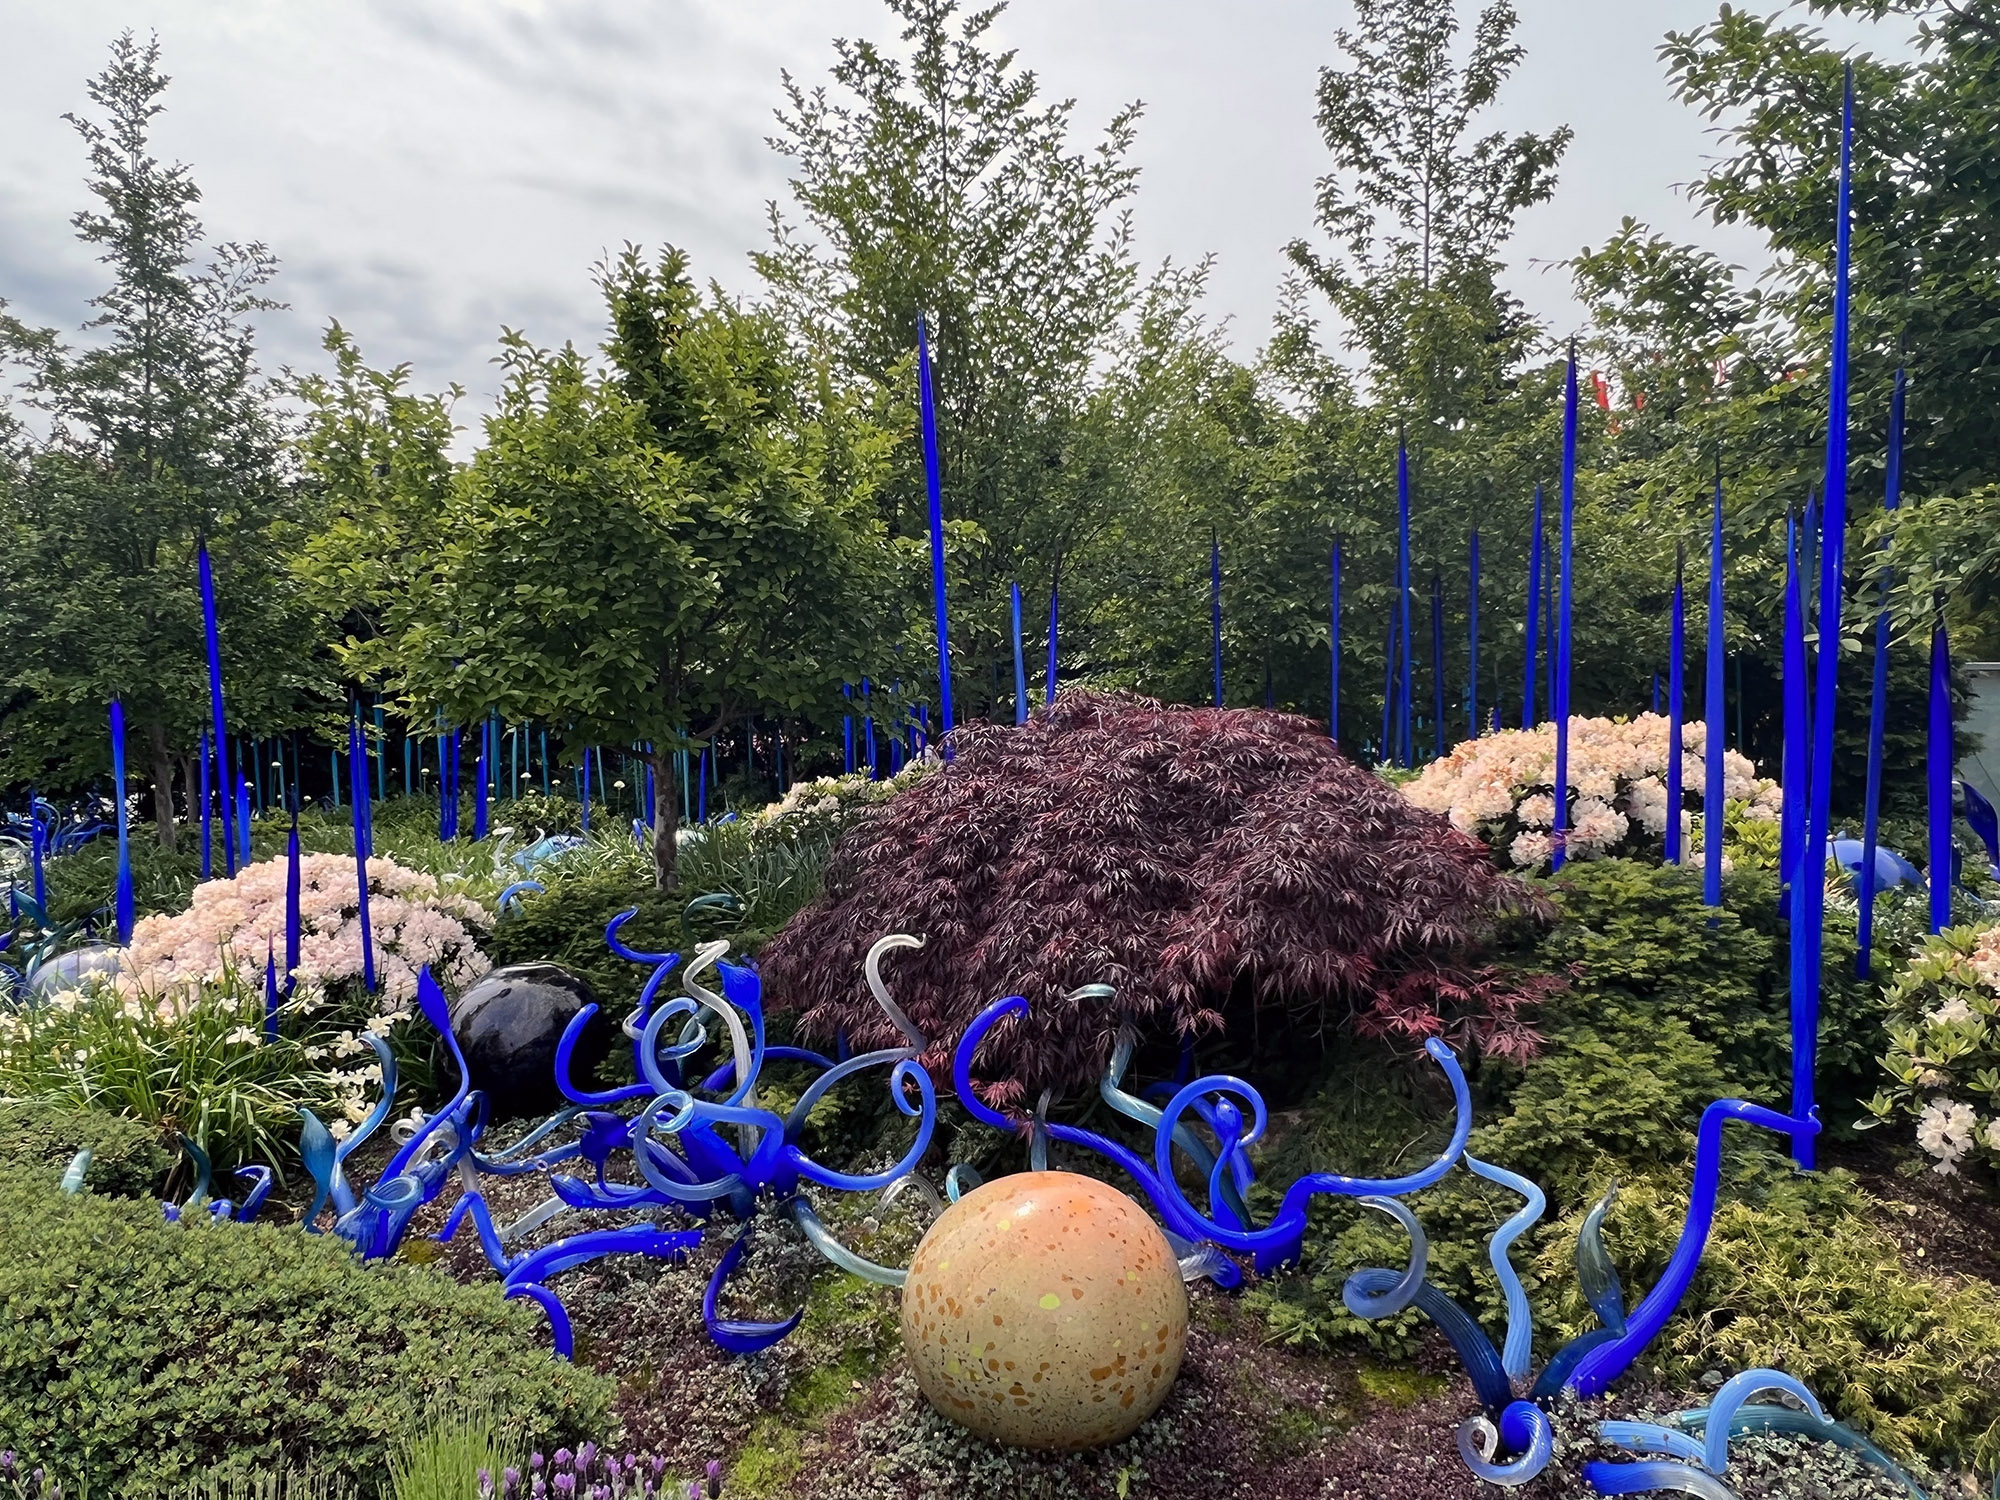
While in the Garden, we were able to see a glass-blowing demonstration, where two artists made a piece right in front of us. They use a mobile glass forge for this experience, and apparently, it’s not always on-site, so it might not be an option when you go. It was incredible to watch how quickly they worked to shape and create a piece.
We spent about an hour and a half before heading to our next stop.
Seattle Monorail
We were done with the attractions we wanted to see at Seattle Center and decided to head to the Aquarium. It would be a 30-minute, 1.5-mile walk, so we took the Seattle Monorail.
This monorail has just two stops, one in Westlake Center in downtown Seattle and one in Seattle Center. It’s a quick and easy way to get between the downtown area and the main tourist attractions. It runs every 10 minutes and costs $3 per adult ($1.50 per kid).
Taking the monorail didn’t save us much time because of having to walk to it and wait for it, but it saved us about 1 mile of walking.
Seattle Aquarium

We chose to stop by the Seattle Aquarium because we still had time to kill in the city before we went home. It wasn’t a “must-do” for us, but it was by the water, so we figured we could check out the area and kill some time.
The building itself isn’t overly impressive, just a large building on the shoreline. As you enter, you see a giant fish tank that has to be at least 20 feet tall and 40 feet wide. After that, one of the first rooms you’d go to had a variety of tide pool touch tanks, where kids could touch start fish and Sea anemones. One of the most impressive creatures here was a giant pacific octopus. It had to be the largest octopus I had ever seen, with huge, bright red tentacles.

A lot of the fish and wildlife here came from the West Coast. Being from the East Coast and having visited many aquariums, it was interesting to see the different varieties of fish in this facility. Most fish were from the Pacific Ocean and surrounding areas.
The second part of the Aquarium was technically in the building next-door at Pier 60. We saw animals like river otters, northern fur seals, and harbor seals in this building. They were all very playful and active during our visit. This area also had an underwater dome where you could see sharks and fish swimming around you.

Overall, we spent about 45-minutes in the Aquarium. It didn’t really seem worth the price to me. The cost varies per date and time, but an adult can be between $30 and $35 per person. It’s not a bad aquarium at all, but it’s relatively small, and it felt pretty dated, especially for that price.
Beneath the Streets Tour of Seattle
In another attempt to fill some time, we tried a Beneath the Streets tour of Seattle. Apparently, Seattle used to be much different, and during development, the raised the land and much of what you see in downtown Seattle is really the second floor of the buildings, the first floor being underground. I read good things about the tour, so we checked it out.

We signed up for “The Underground History” tour from Beneath The Streets, which cost $27 per person. When we showed up, the current tour group was full (they max out at 25 people), so we signed up for the next one. The tour started in a small room where we heard the history of Seattle and how it began. Then we proceeded to walk into a back room, which used to be the ground level of a store.
Overall, the tour was about an hour, and of that time, probably half was actually spent exploring the underground. So it was a little disappointing. If it had been called a “History of Seattle” tour, I would have understood it, but being called an underground tour, I expected to be walking through long lengths of dark tunnels, not just going to the basements of a few buildings. The tour guide himself was engaging, but overall, I wouldn’t recommend this tour.
Tip: Pay attention to which tour provider you’re using. We were initially looking to book a different tour, Bill Speidel’s Underground Tour. We read great reviews of that provider. As we got where our GPS told us to go, we saw the sign for Beneath the Streets and assumed that’s what we were looking for. We later discovered that the tour we wanted was half a block away. I can’t say if that would one be better or worse, though.
Seattle to Sea-Tac Airport
It was time to start heading toward the airport for our trip home, but we still had plenty of time. Since we weren’t in a rush, we decided to use the SoundTransit Link Light Rail train rather than Uber or a Taxi. We walked for about 10 minutes to the train stop in Westgate Center (where the monorail let us off). We had to take the 1 Line southbound towards Angle Lake. The price was very cheap, only $3.50 per person.
We purchased our tickets and got on board. It’d be 11 stops and 35 minutes to reach the airport. Overall it was an easy ride; it was mostly a typical commuter train you’d see in any city. I don’t know if I’d recommend it if you had all your bags though, as the trains could get quite full.

Airport Chaos in Seattle
We arrived at the Sea-Tac Airport and started our check-in process. The security lines were long, but the staff kept redirecting people to other security lines to make it faster. Overall, it took us 20 minutes to get through the security checkpoint, which gave us 2 hours before our flight.
An hour before our flight was supposed to take off, it was canceled. Just another one of the many cancellations happening that day. It seems to be happening with all the airlines nowadays, but this specific cancellation was by Alaska Airlines. I won’t go through the whole experience because this is a cruise blog, not an airline blog, but a few tips.
Tip 1) Let Google do the work for you
If you have an Android phone, save your electronic boarding pass to your Google Wallet / Google Pay. Because I did this, Google notified me of the change almost 30 minutes before Alaska Airlines. That gave me a chance to call in and change my flight before everyone else on my flight. Because of that advantage, I could grab some remaining seats on another flight that evening (everyone else was rescheduled for 3 days later).
Tip 2) Take a picture of your bag tags
If you use Port Valet, take a picture of the bag tags you’re putting on. We didn’t, and because of that, we didn’t have the tracking number that made it easy for the airline to look up our bags. They still could find them, but it took about 5 minutes. So a picture would have saved time.
Tip 3) Use a Bluetooth tracker for your luggage.
Since our bags were already checked-in for our flight, they’d have to be changed to our new flight. Alaska Airlines said this would be done. It was not. How did I know? I had a Tile Bluetooth tracker in my suitcase, and as soon as we landed in Newark, NJ, I could see my bag was still in Seattle. We went through the whole process and got them shipped back to our house directly, and all along the way, I was able to track where they were, Seattle, Saint Louis, Philadelphia, and finally on their way to my house. These trackers are relatively cheap, less than $30 each, and most last a year before they need a replacement battery (that costs about $2). Both AirTags and Tile also don’t need a subscription (although you can add extra features for a cost).
Now, these aren’t going to tell you what’s happening in real-time. They’re Bluetooth, meaning they only register their location if they’re by a smartphone with the app installed on it. AirTags, which are run by Apple, have the best coverage because basically any recent iPhone or Ipad is used for the location. Tile, which works on Apple and Android, has a smaller network, but I could still track my bags as they crossed the country.
On a daily basis, I keep a Tile finder on my keys in case I ever misplace them. I just take the tag off my keys and throw it in my bags when traveling. Twice, while traveling, I’ve lost bags, and Tile showed me exactly where to find them. It’s totally worth the small cost for me.
No products found.
Follow along on the rest of our Alaskan cruise on Ovation of the Seas
Ovation of the Seas – Cruise Blog - Day 1 – Seattle
Ovation of the Seas – Cruise Blog - Day 2 – Sea Day
Ovation of the Seas – Cruise Blog - Day 3 – Juneau
Ovation of the Seas – Cruise Blog - Day 4 – Skagway
Ovation of the Seas – Cruise Blog - Day 5 – Sitka
Ovation of the Seas – Cruise Blog - Day 6 – Sea Day
Ovation of the Seas – Cruise Blog - Day 7 – Victoria
Ovation of the Seas – Cruise Blog - Day 8 – Debarking in Seattle
6 Hits & Misses of Ovation of the Seas
If you want to stay up to date with what we publish, sign up for our monthly newsletter
CruiseSpotlight is an Amazon Associate. We may earn a commission when you click links to retailers and purchase goods.


